Setup Github Workflow to generate Dataverse Entity Classes
As a person who cherishes "Early-Bound" so much, I want to ensure my team also uses it in the project. The step to generate the "Early-Bound" is not too complicated, especially after Microsoft Power Platform CLI (pac modelbuilder build). But, again, enforcing it on other team members is always been such a problem - and the reality is that the "job" to generate the metadata seems to become mine (please, don't ask me why 🥲). Hence, creating automation became the only solution to make the development faster (and to remove that job from me).
The scenario for the usage of the workflow will be as follows (assuming the necessary metadata already exists in Dev Environment - Dataverse):
- The developer needs to create a Pluginbased on certainTables/Attributes (can be new or existing - but the classes not yet generated).
- The developer creates a new git branch for the feature that he/she wants to work on.
- On the new branch, the dev edits the builderSettings.json to add the table (if not yet exist there).
- Run the workflow on the feature branch.
- The developer just needs to pull the changes in his/her local environment and start working on the feature.
Project Structure
Here is my project structure:
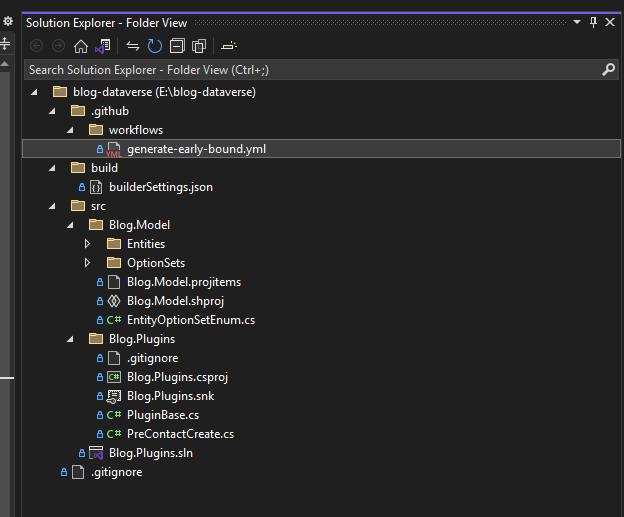
Github Project Structure
I created 2 folders:
- build: contain the builderSettings.json file (the file will host all the settings to generate the metadata which will be explained later).
- src: this folder contains Plugin Project (Blog.Plugins) and also Blog.Model (C# Shared Project). All the generated metadata will be put in the Blog.Model. Blog.Plugins will reference the Blog.Model.
Prerequisites
Here are all the requisites of this blog. I will skip the things that I guess everyone understands such as the need to create the Github repo 😁.
Create Dataverse Application User
HEY! Now we have the easiest way to create an Application Userin Dataverse (including to set up the permission)! First, you need to install Microsoft Power Platform CLI into your system > create authentication to your Dataverse Dev environment with the environment admin privilege (pac auth create). Then, you just need to run:
pac admin create-service-principal --environment <your_dev_environment_guid>
The system will create the App-User and give the necessary permission to the environment:
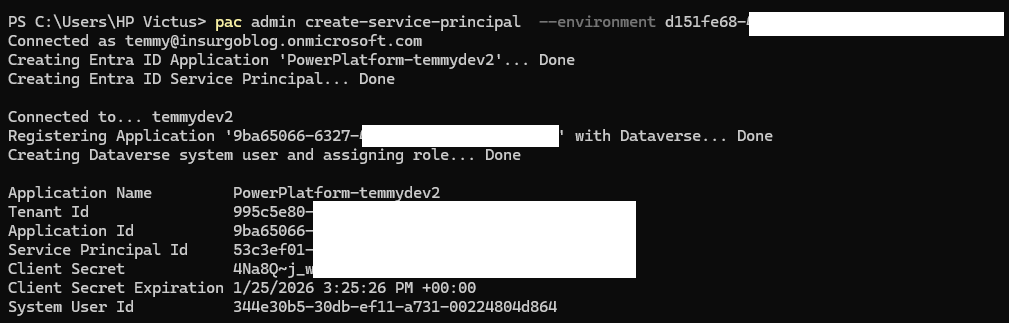
Generated App User
Don't forget to copy that information for later usage.
Generate Github Personal Access Token
Open your GitHub > On the top-right of your Github profile > click Settings > go to Developer settings > click Personal access token > Generate new token (classic).
Give the name of the Note, set the Expiration, and click repo (this means we only give permission to the repo) > scroll to the bottom and click Generate token:
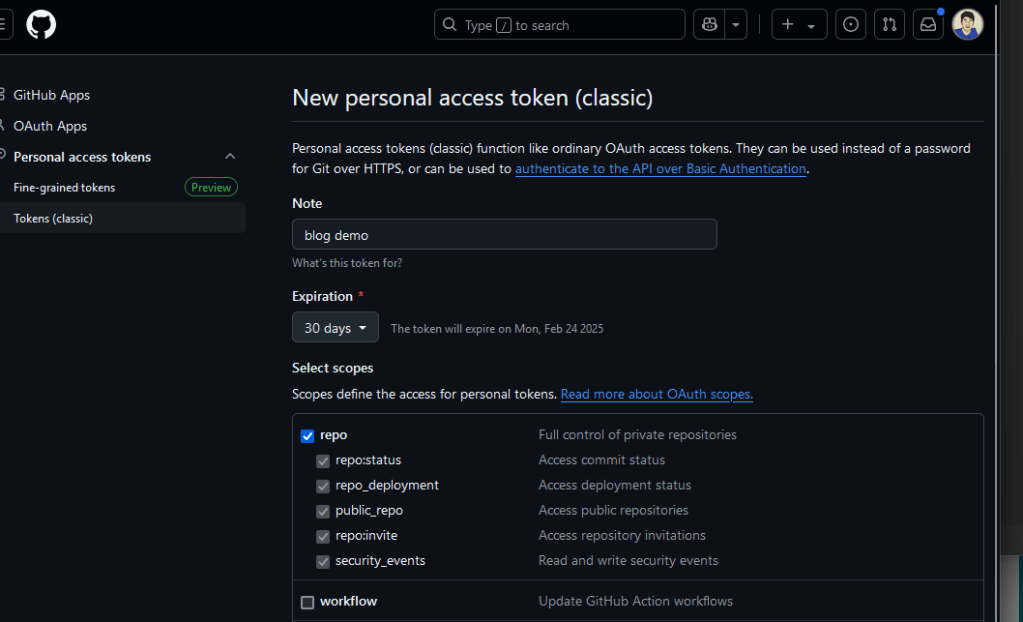
Generate PAT
Copy the token for the next step.
Repository Variables & Secrets
Go to your repository > Settings > Environments > Create New environment. I named the environment "development" (this value will be used in the workflow!):
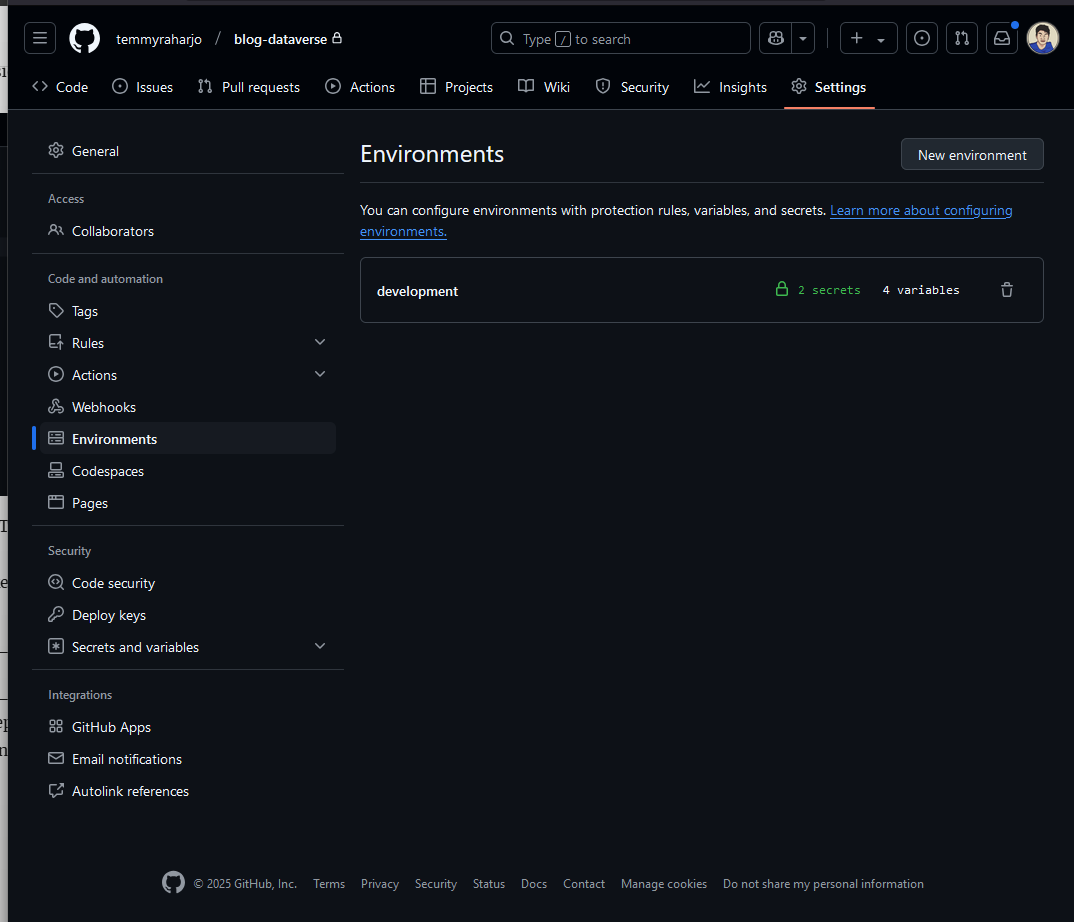
Create development Environment
Then you can input the below variables and secrets based on the previous information:
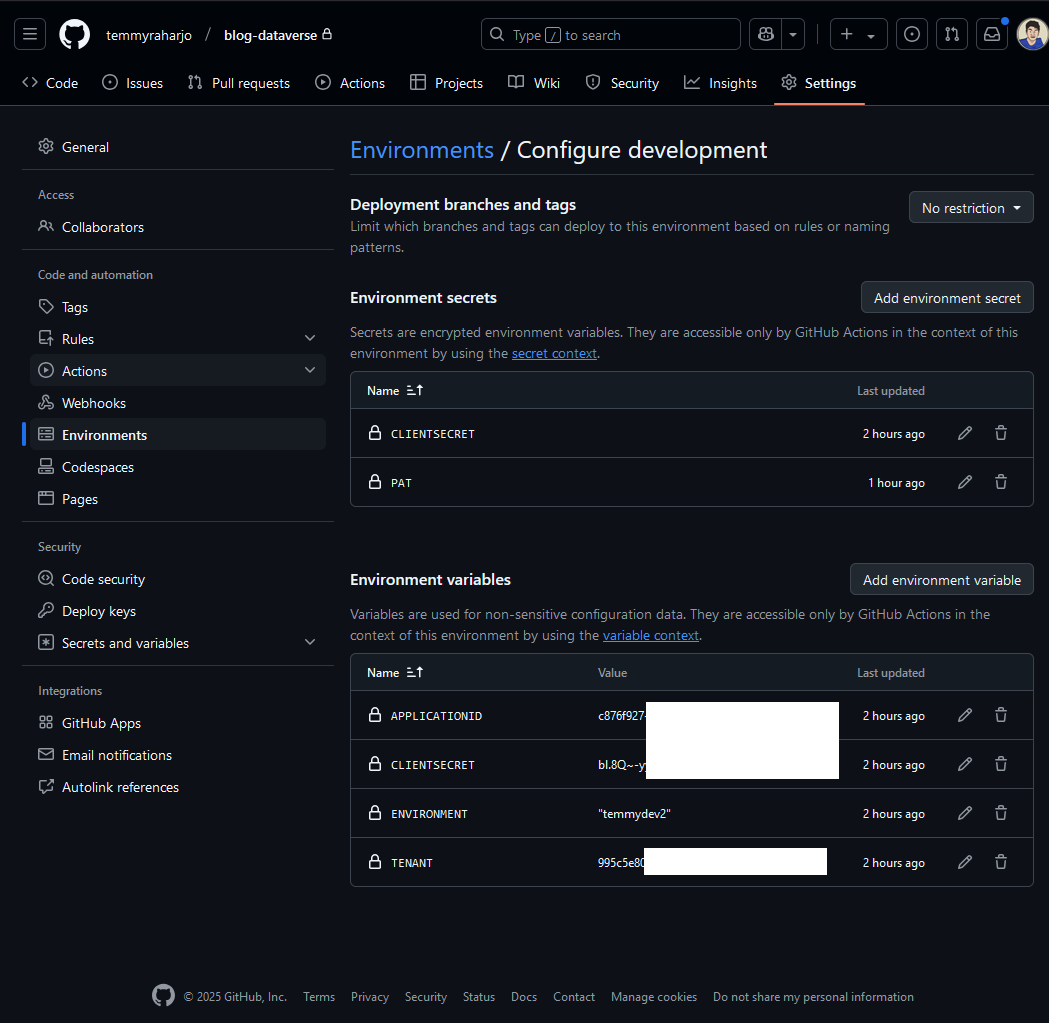
Environment variables & secrets
Setup Actions - Workflow Permission
Last, we need to set the Workflow Permission. Go to the repo > Settings > Actions > General. Set the Workflow permissions to "Read and write permissions" (this will give permission to the workflow to push into the repo) > click the Save button:
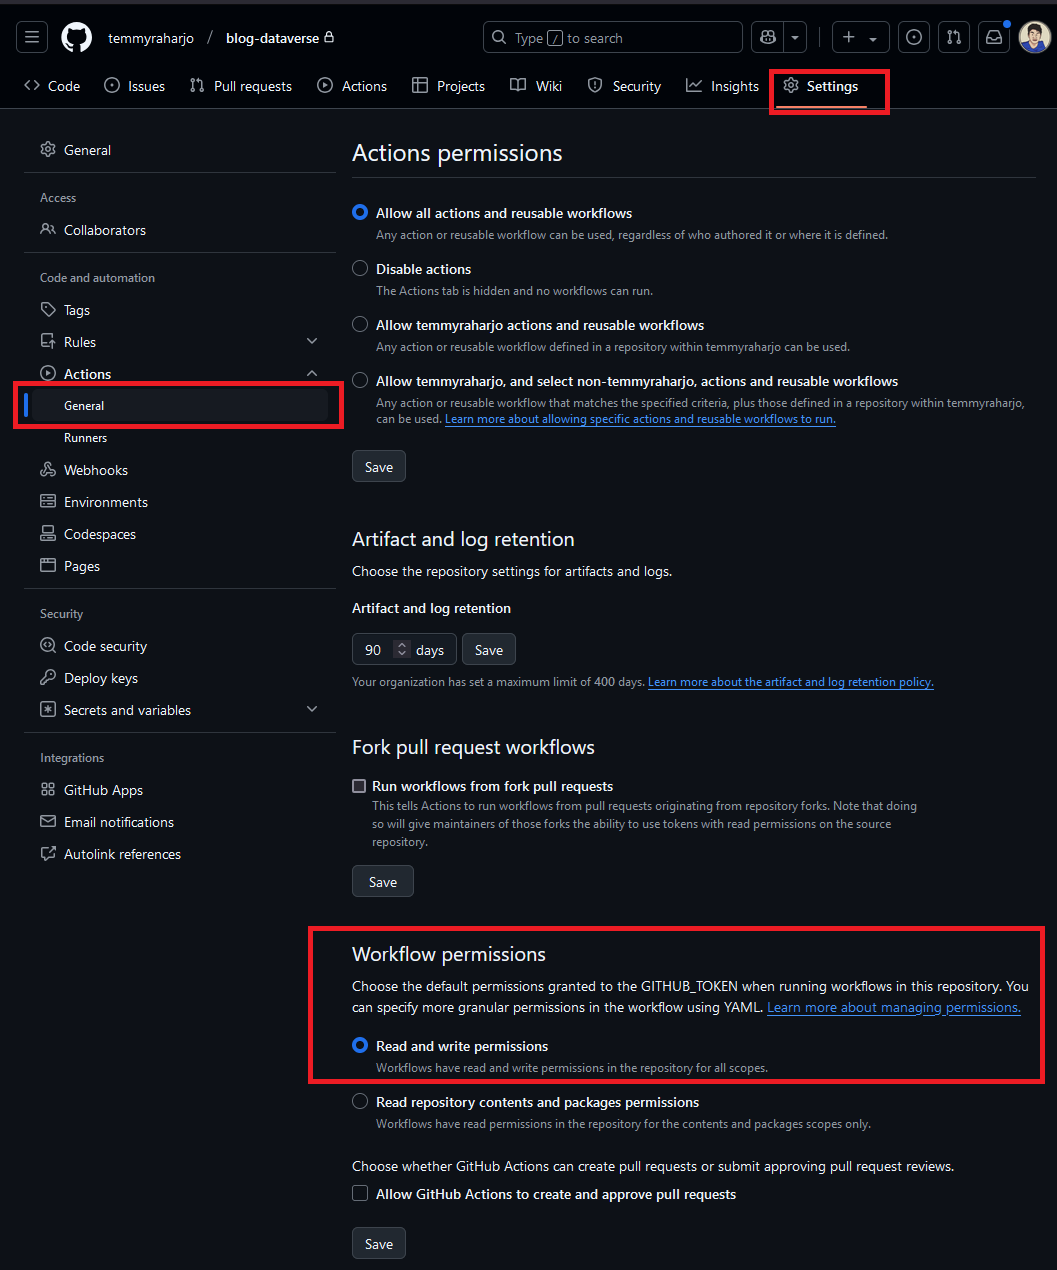
Set Workflow permissions
builderSettings.json
Before we create the workflow, as I mentioned before, we need to set the builderSettings.json. For the demo, here is my builderSettings.json:
{
    "suppressINotifyPattern": false,
    "suppressGeneratedCodeAttribute": false,
    "language": "CS",
    "namespace": "Blog.Model",
    "generateSdkMessages": false,
    "generateGlobalOptionSets": true,
    "emitFieldsClasses": true,
    "entityTypesFolder": "Entities",
    "messagesTypesFolder": "Messages",
    "optionSetsTypesFolder": "OptionSets",
    "entityNamesFilter": [
          "contact"
    ],
    "messageNamesFilter": [],
    "emitEntityETC": false,
    "emitVirtualAttributes": true
}
Once all of this is ready, let's create the Workflow!
GitHub Workflow
Open your Github repo > go to Actions > click New workflow > click "Set up a workflow yourself" > give it the name and set it like the below yaml file:
name: Generate Early Bound

on:
  workflow_dispatch:

jobs:
  build:
    runs-on: ubuntu-latest
    environment: development
    env:
      GITHUB_TOKEN: ${{ secrets.PAT }}

    steps:
    - name: Checkout Repository
      uses: actions/checkout@v2

    - name: Setup .NET
      uses: actions/setup-dotnet@v2
      with:
        dotnet-version: '8.0.x' # Adjust the version as needed

    - name: Install PAC CLI
      run: dotnet tool install --global Microsoft.PowerApps.CLI.Tool

    - name: Create Auth
      run: pac auth create --environment ${{ vars.ENVIRONMENT }}  --applicationId ${{ vars.APPLICATIONID }} --clientSecret ${{ secrets.CLIENTSECRET }} --tenant ${{ vars.TENANT }} --accept-cleartext-caching

    - name: Run PAC ModelBuilder
      run: |
        cd build
        pac modelbuilder build --outdirectory ../src/Blog.Model --settingsTemplateFile builderSettings.json

    - name: Configure Git
      run: |
        git config --global user.name 'github-actions[bot]'
        git config --global user.email 'github-actions[bot]@users.noreply.github.com'

    - name: Commit and Push Changes
      run: |
        git add .
        git commit -m "generate metadata"
        git push
The workflow will be set as a manual workflow (workflow_dispatch). To run it, you need to go to Actions > select "Run workflow" and select the branch against which to run it.
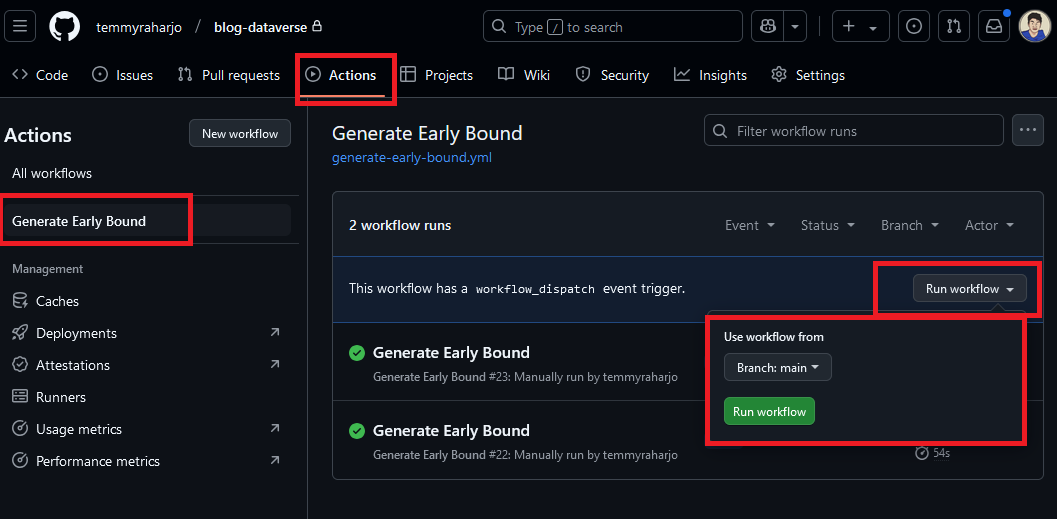
How to run the workflow
The agent to run the job will be set as "ubuntu-latest". Then, we have "environment" which I set as "development" (the name of the Repo Environments that we set earlier). This is very important to make the workflow read the variables and secrets we set up earlier.
Also, we set the GITHUB_TOKEN as the secrets.PAT means this workflow will push the changes based on the PAT selected.
The flow will be check out the repository > install .NET 8.0 > install the Microsoft Power Platform CLI.
Then, we will create an auth based on the App User by calling "pac auth create". We consumed the necessary variables and secrets here.
Once authorization is created, we run the pac modelbuilder by passing the outdirectory and settingsTemplateFile parameters (again, this is based on the project structure).
After all the files are generated/updated, we just need to set up the git username and email information and push the changes.
Demo
Assuming I'm the developer that needs to generate the metadata. I created a new branch and changed the builderSettings.json > add "teammembership" table:
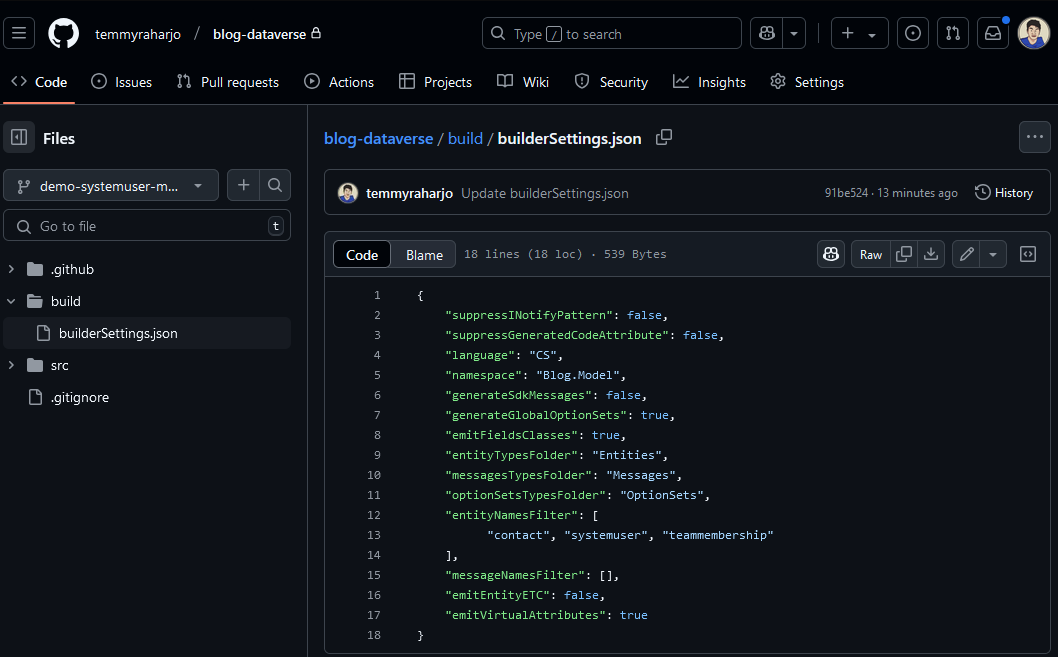
Add teammembership table
Once committed > go to GitHub > repo > Actions > click the Workflow (Generate Early Bound) > run workflow > select the feature-branch > Run workflow:
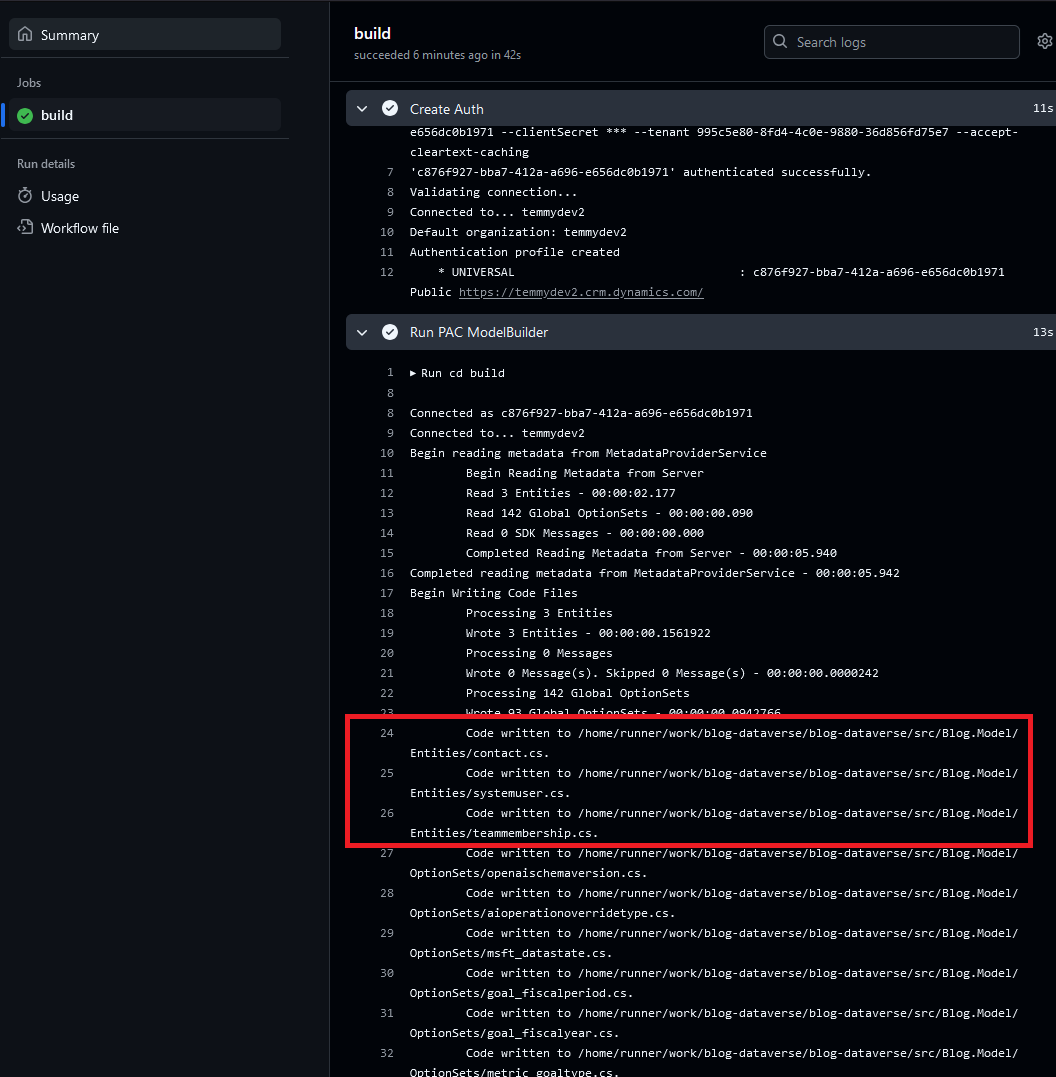
Workflow successfully ran!
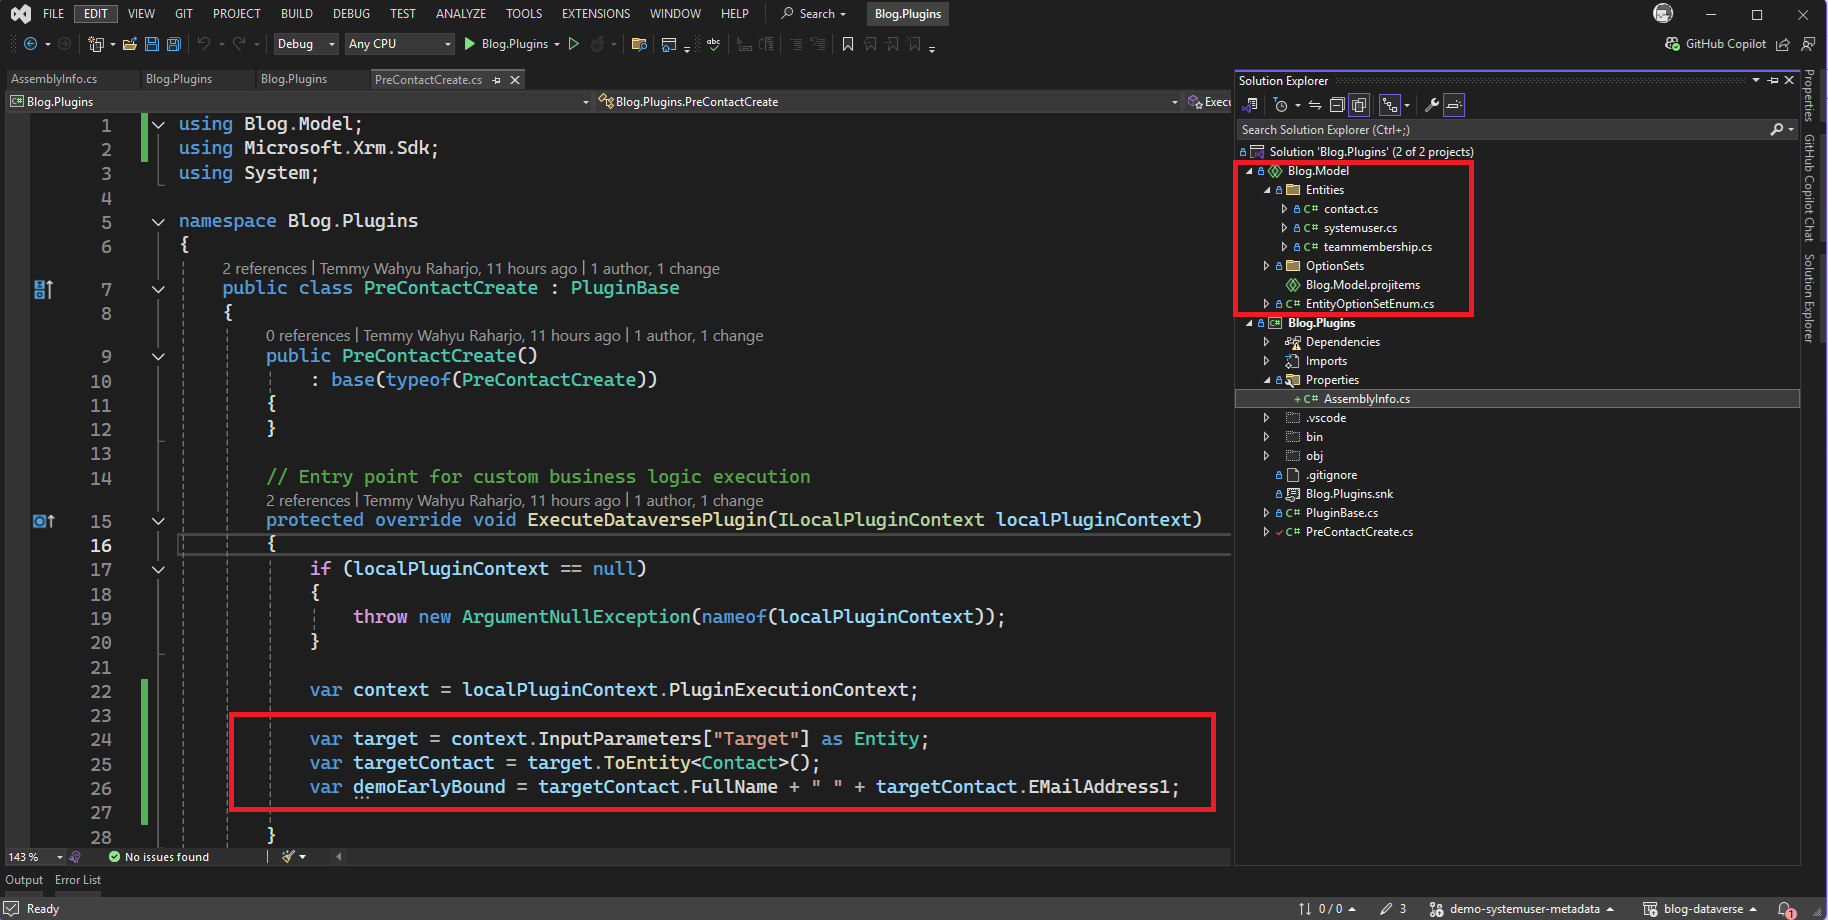
The dev just needs to select the branch > pull changes > open the Visual Studio (make sure to tick "Show all files") and you can see the changes:

Metadata generated and ready to be used
BONUS: Don't forget to create a Properties folder on the plugin project > add Assembly.cs and set the below code:
[assembly: Microsoft.Xrm.Sdk.Client.ProxyTypesAssemblyAttribute()]
You just need to right-click on all the files > Include in the project > start generating the plugin code!
Demo early bound in the plugin!
Happy CRM-ing! 🚀
Leave a comment
Your comment is sent privately to the author and isn't published on the site.