Power Platform Pipelines: Deploy Solution using specified Service Principal
Someone asked me about an interesting scenario which I think is also very common when we want to implement ALM (Application Lifecycle Management). He has multiple service accounts that will be the owner of all the solution components on each of the environments. For example, the UAT Service Account will own all the Flows in the UAT Environment. Based on that requirement, I found how to deploy a solution as a service principal/pipeline owner using the Power Platform Pipelines app. So, let's implement it step by step!
As mentioned in the Learn's article, the prerequisites for this are:
- One of the following Microsoft Entra roles: Global Administrator, Cloud
- Application Administrator, or Application Administrator. You must be an owner of the enterprise application (service principal) in Microsoft Entra ID.
Dev Setup
First, I need to install Power Platform Pipelines in the Dev Environment. So, you can go to admin.powerplatform.com > go to "Resources" and "Dynamics 365 apps" > find "power Platform Pipelines" and install it:
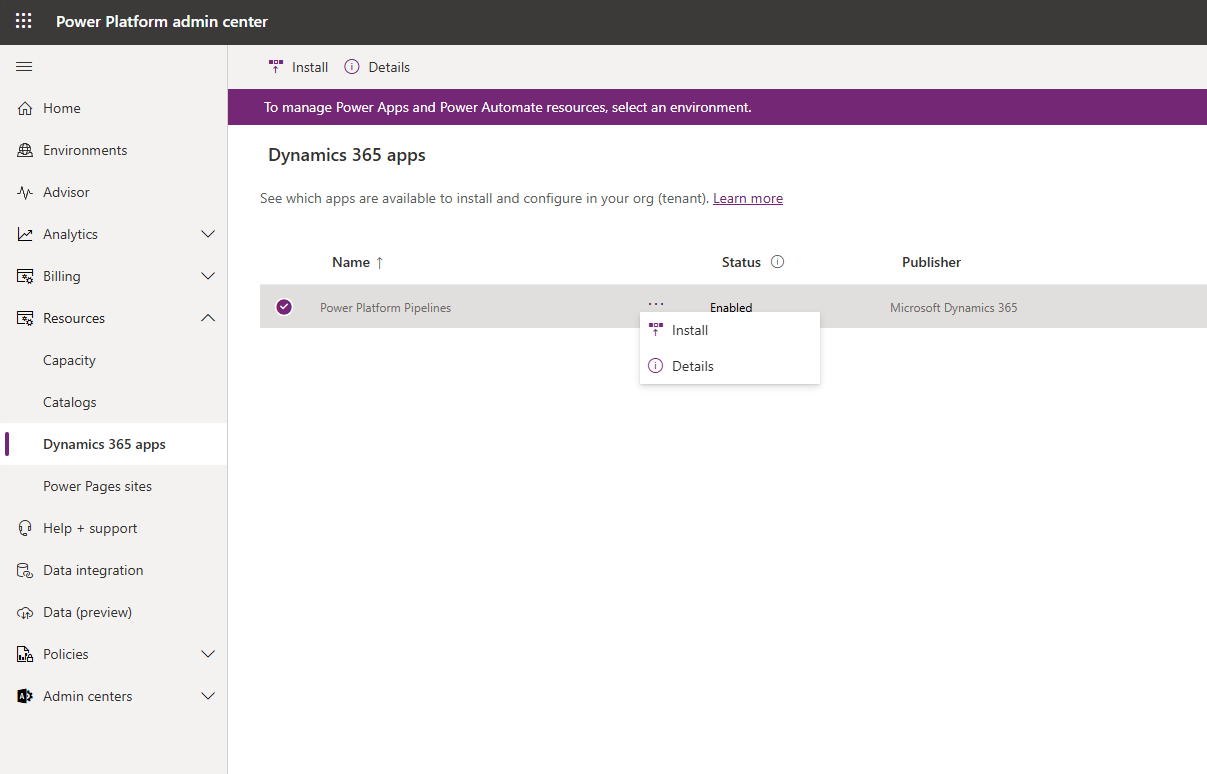
Install the Power Platform Pipelines app
Next, you need to choose which Environment to enable this app. You need to select the Dev environment only and you can install it.
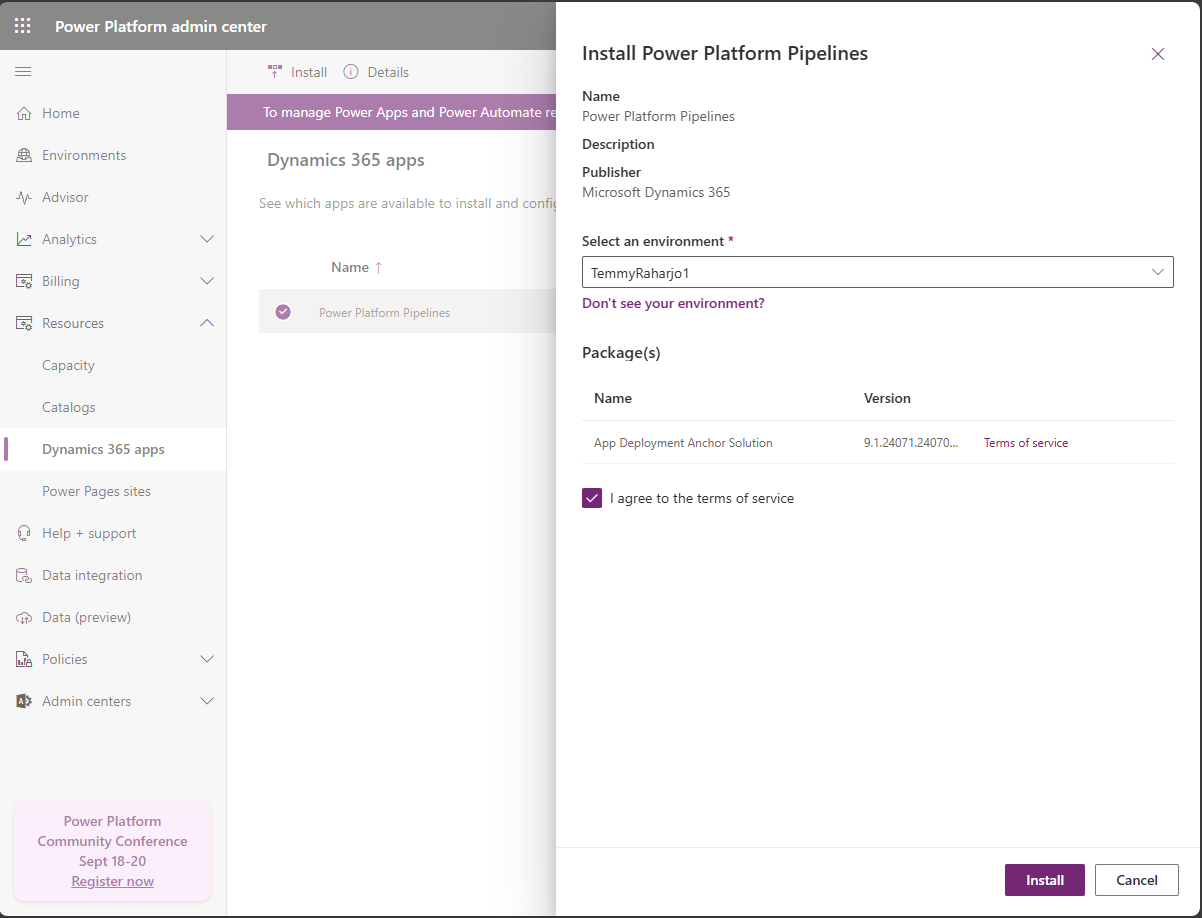
Install the Power Platform Pipelines app
To create a Service Account, you can follow this blog post by Matthew Devaney.
Once you added the Service Account to the Dev Environment, you need to give "Deployment Pipeline Administrator" security roles:
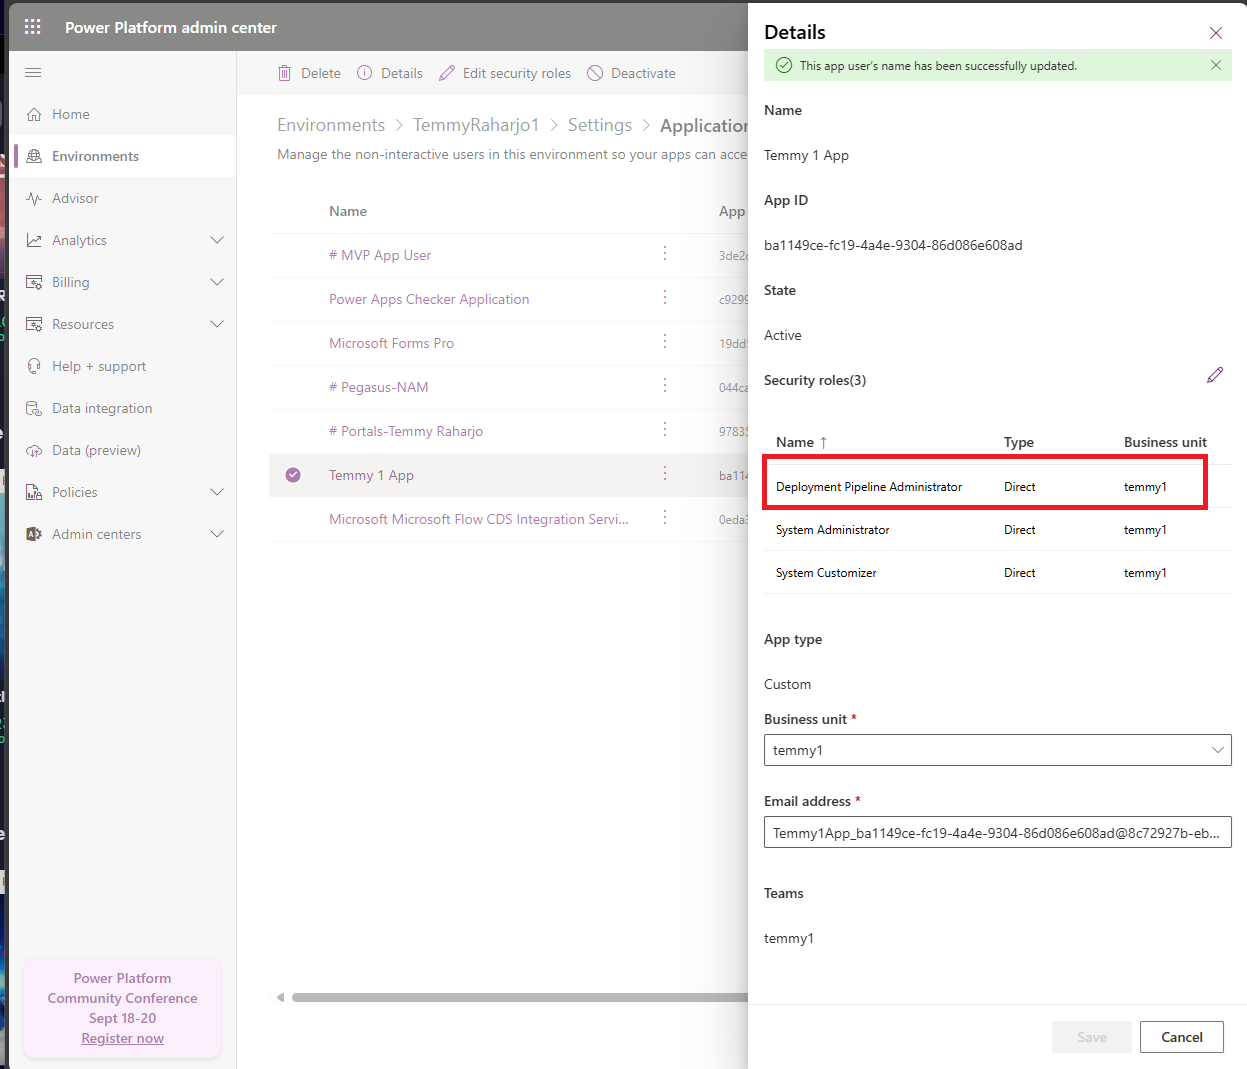
Add Security Role "Deployment Pipeline Administrator" to the Service Account
Target Environment Setup
For the Target Environment setup, we just need to make sure the Service Account is added to the environment and set the Security Roles using "System Administrator":
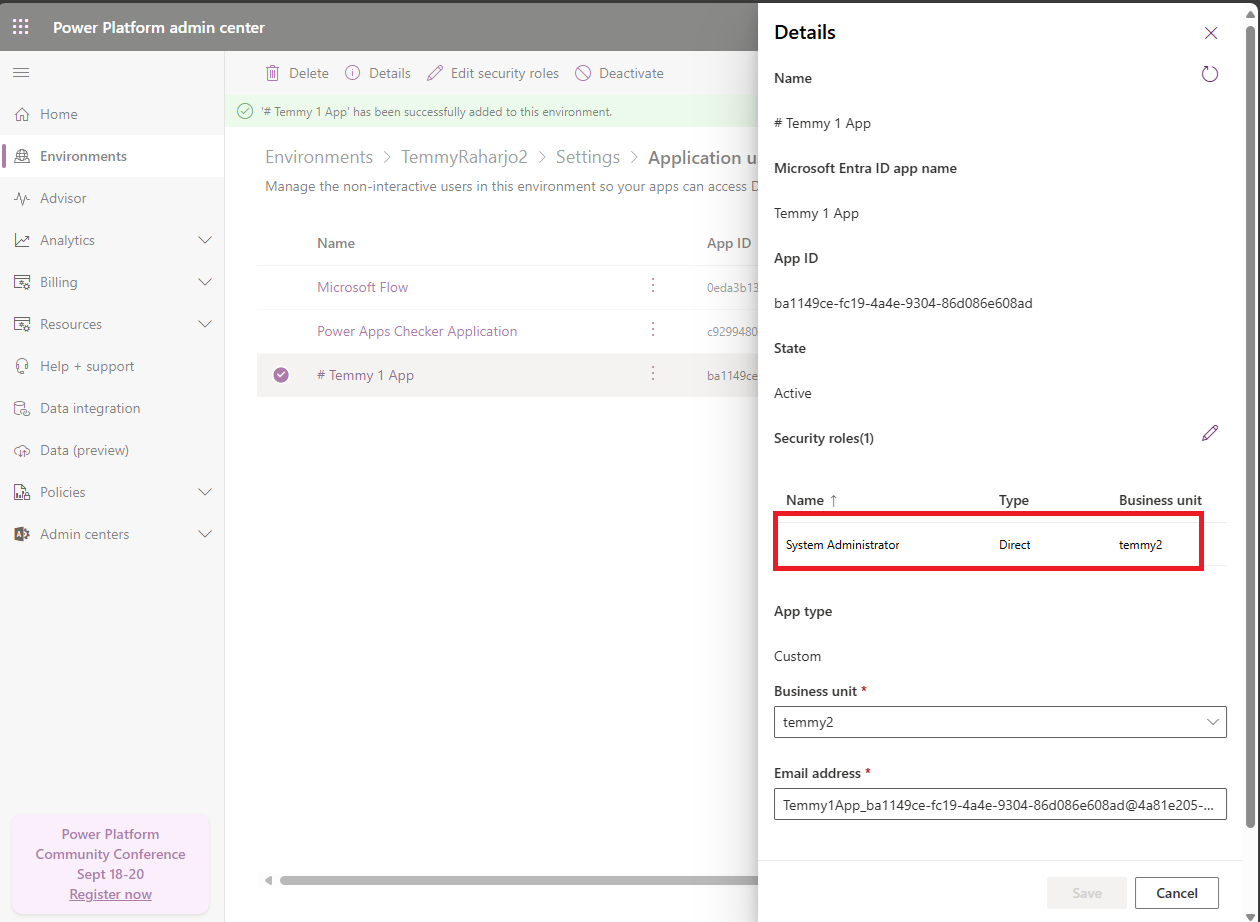
On Target Environment, add the System Administrator security role to the Service Account
Deployment Pipeline Configuration Setup - Dev Environment
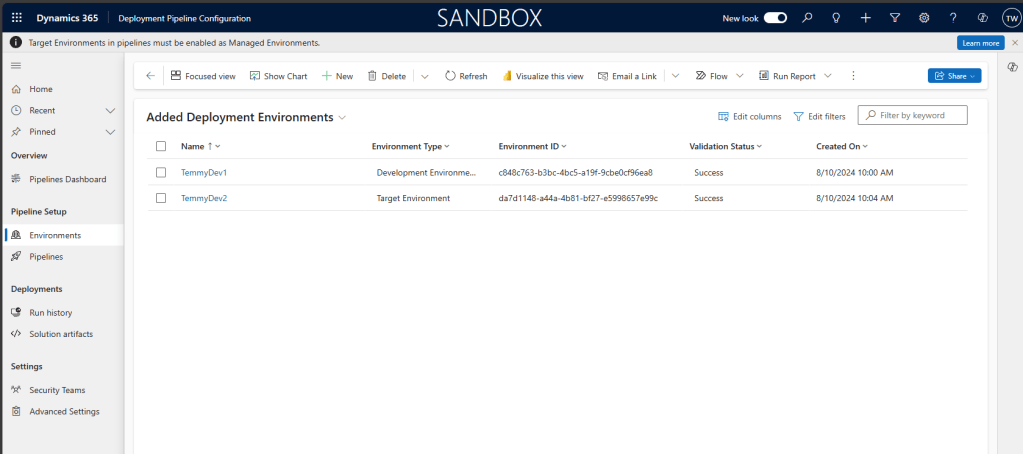
You can go to the "Deployment Pipeline Configuration" app in the Dev environment > go to Environments. Here, you need to create the Environments (Development and Target Environments). I'm not showing the steps to create this because I think it is pretty easy. You just need to know the Environment ID for each of the Environments. Please, ensure the Validation Status is "Success":
Go to Pipelines > Create New > Set the Name of the pipeline > Add the Development Environment to this pipeline:
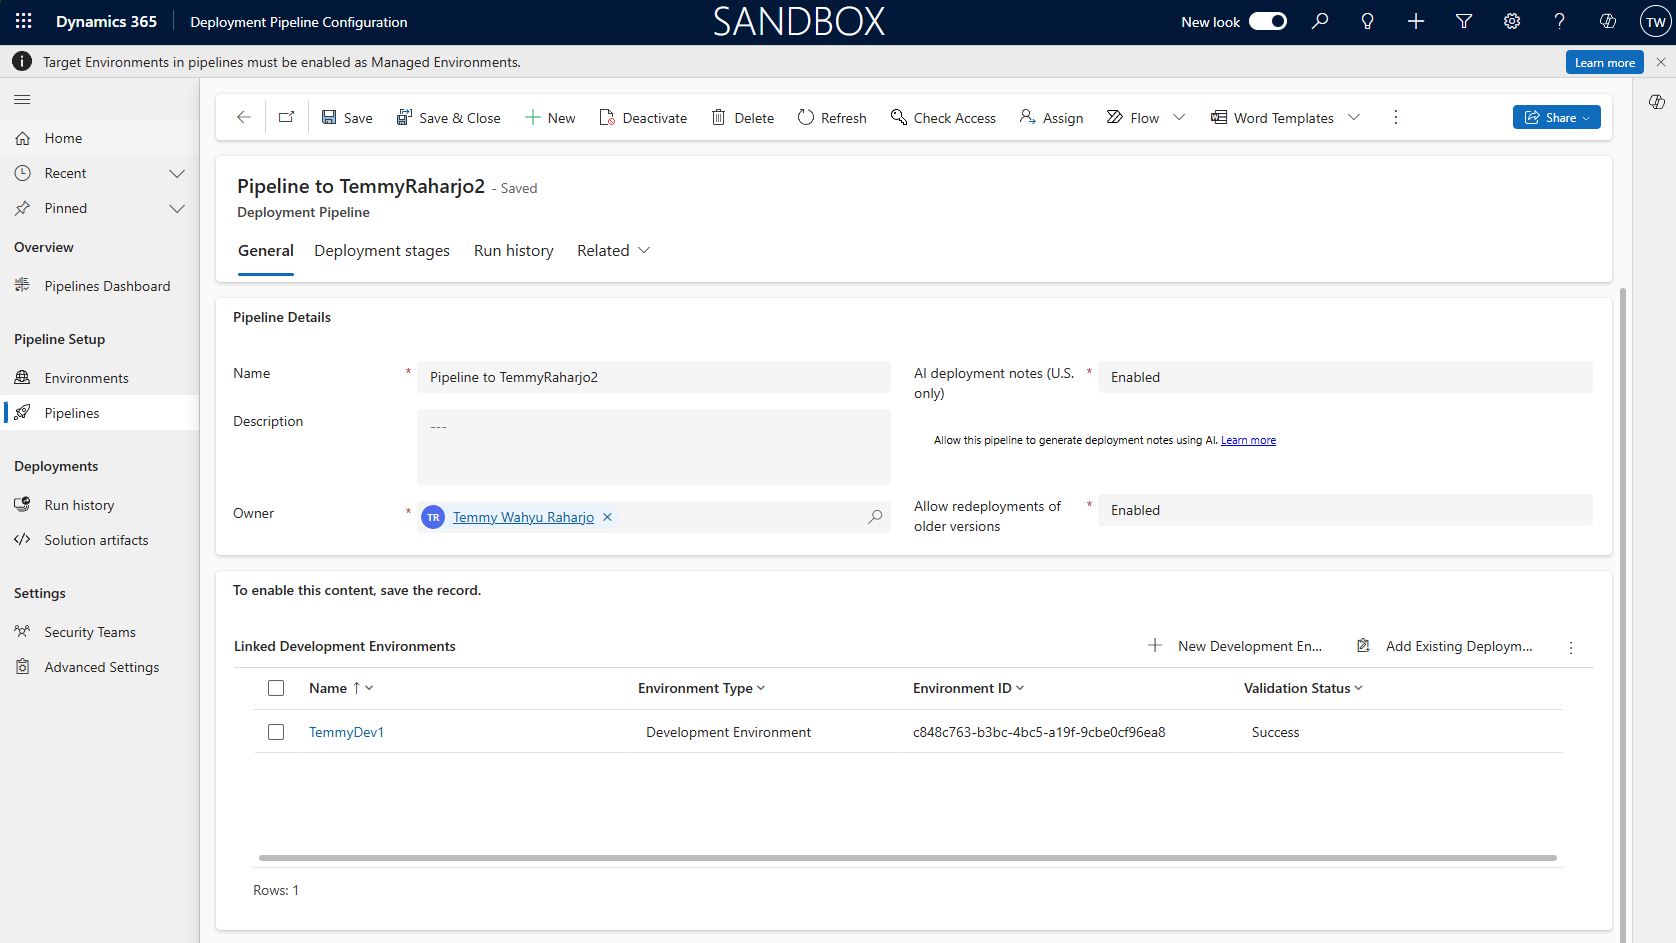
Create Deployment Pipeline
Next, we need to get the Service Account - Client ID. You can go to portal.azure.com > App Registrations > select the App and copy the Application ID (Client ID):
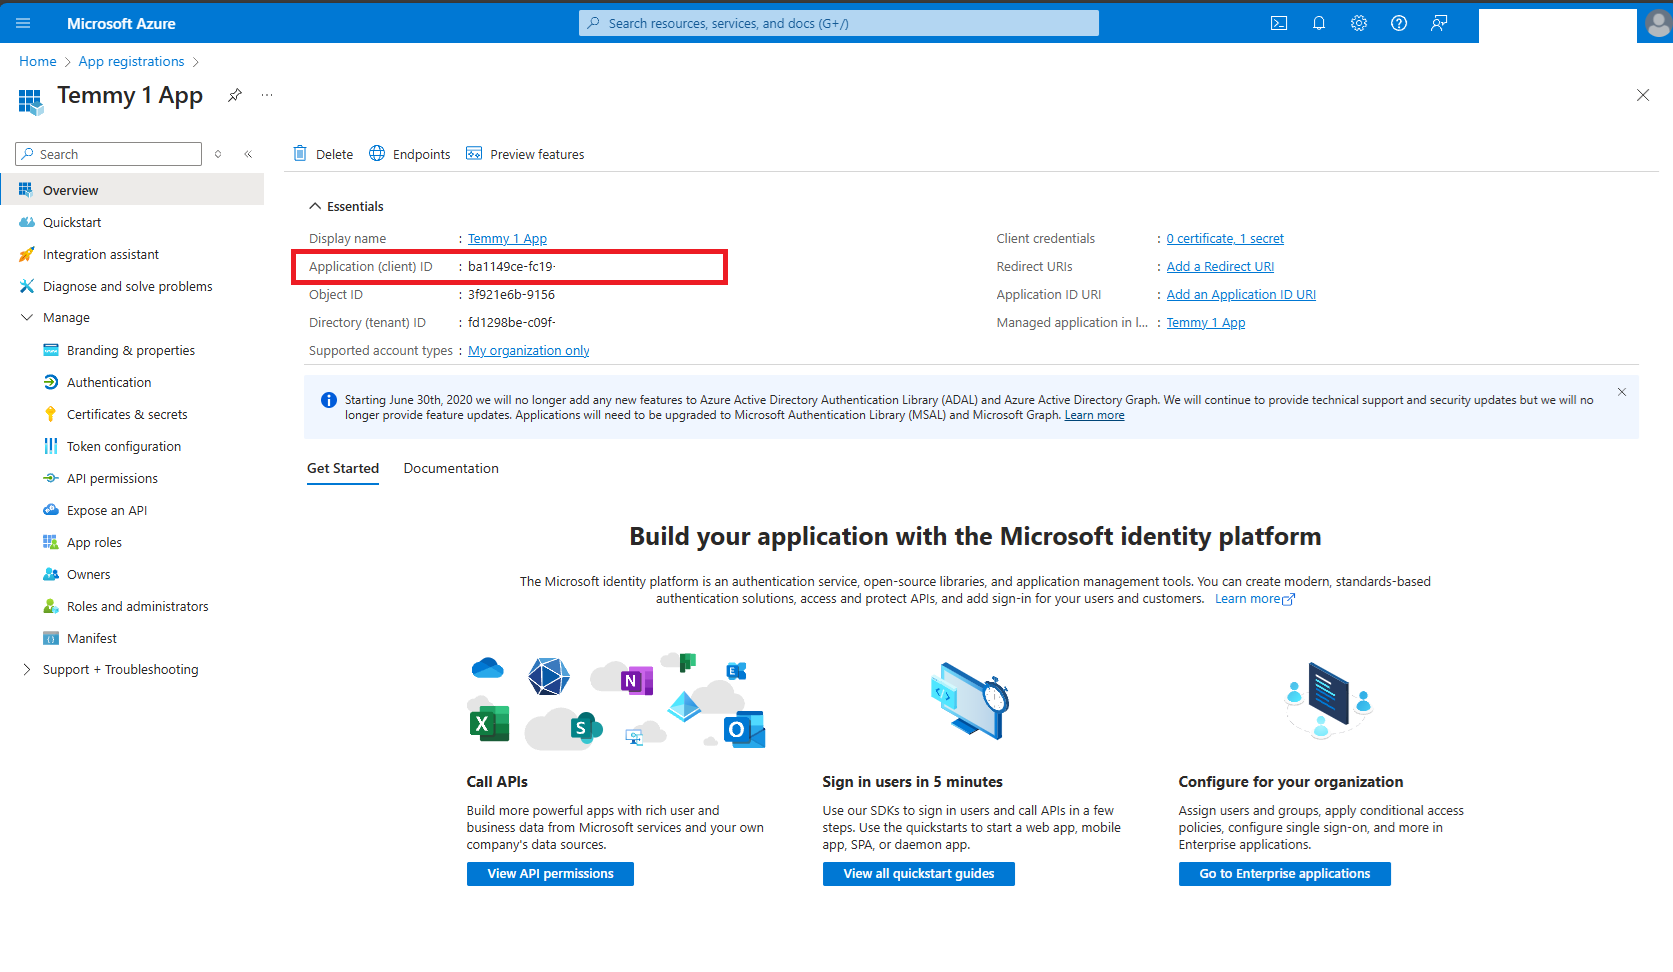
Get the Application (client) ID
Then, you need to create the Deployment Stage. You will need to give it the Name, and select the "Target Deployment Environment ID". The most important thing is to check the "Is Delegated Deployment", set the Delegated Deployment Type as "Service Principal", and also provide the SPN Client ID (based on the previous step):
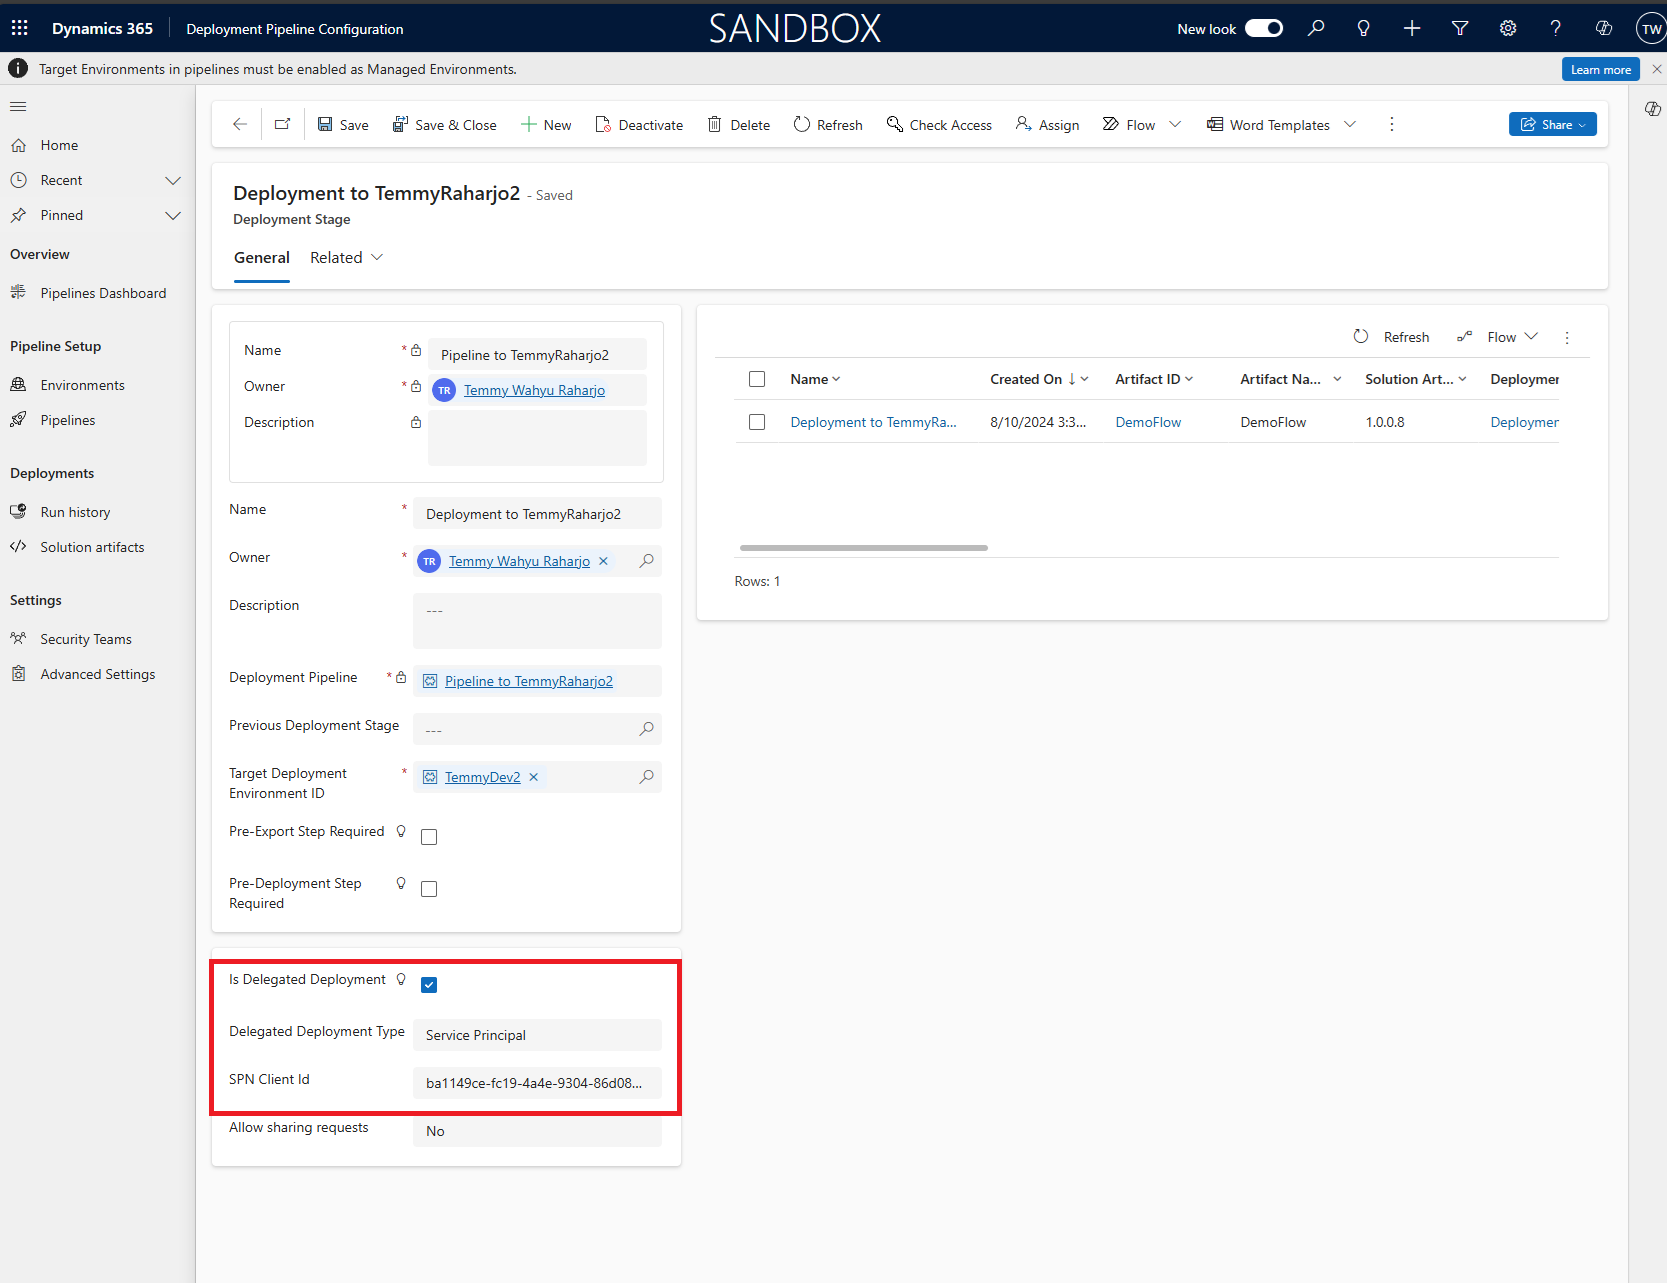
Setup the Deployment Stage
Create Auto-Approved Flow
Once you check the "Is Delegated Deployment" in the previous step, we need to have an Approved/Reject mechanism for every deployment attempt. If you do not do this part, your deployment will forever stuck in the "Pending" state.
Because I don't want to have an approval mechanism, so, basically I just want every deployment to be directly approved. So, we need to create a flow that automatically triggered using Action "OnApprovalStarted" (Dataverse):
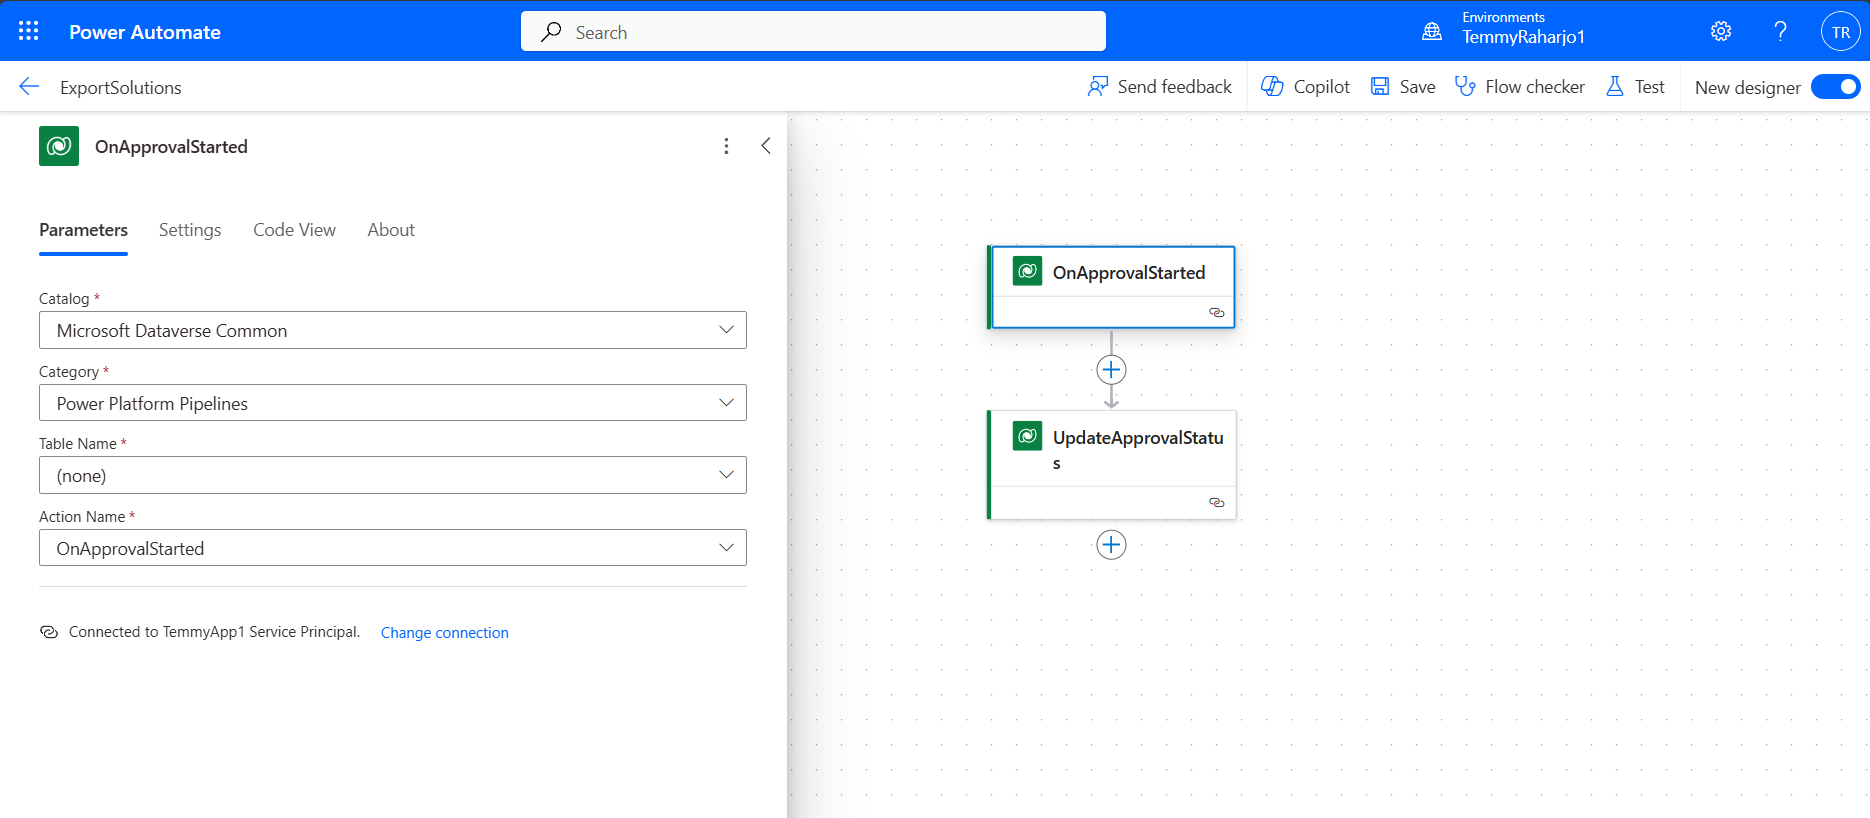
Create a flow which will be triggered OnApprovalStarted
Last, we need to update the approval status by calling the "UpdateApprovalStatus" action:
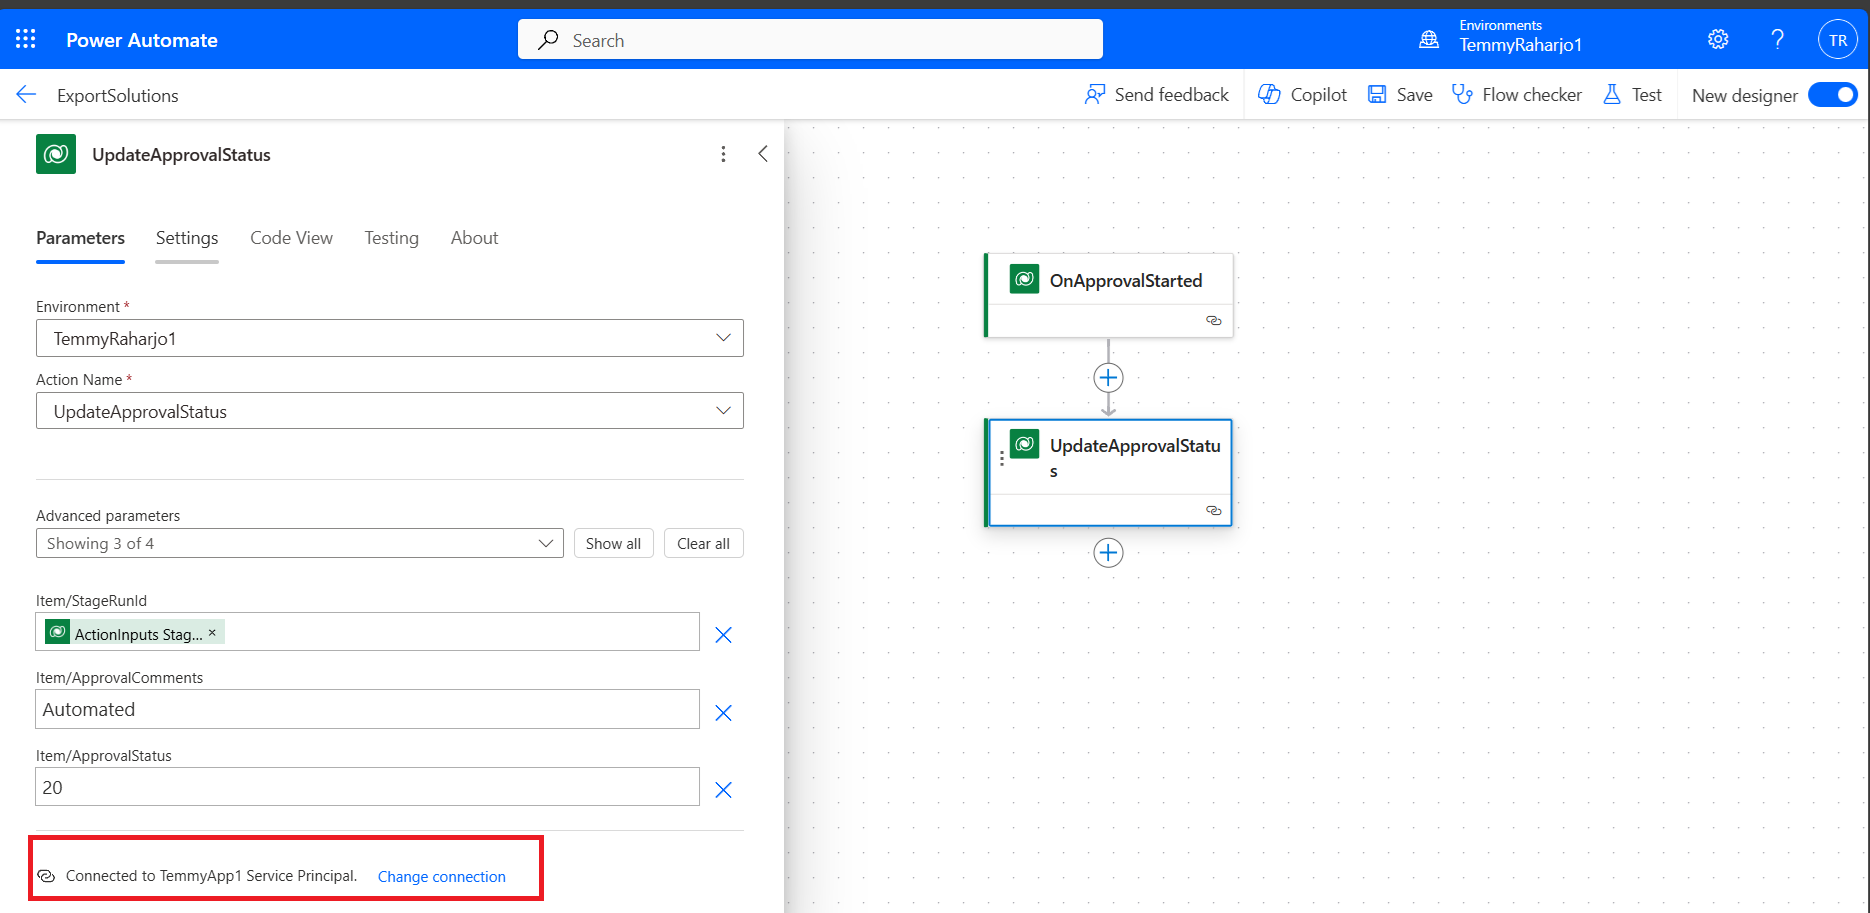
Update the deployment approval status
As this is just for demo purposes and I only have a single Target environment, I can directly set the Approval to use the targeted Service Principal (Connected to "TemmyApp1 Service Principal"). But, if you have multiple target environments, you need to have logic to determine which connection to use. If you are using the wrong account to approve, then you will get the below error:
Delegated deployments of type 'ServicePrincipal' may only be approved or rejected by the Service Principal configured in the deployment stage.
Deployment Time
In the last part, we just need to deploy something. Go to Dev Environment > select the solution that you want to deploy > go to Pipeline > Select the Pipeline > click the "Deploy here":
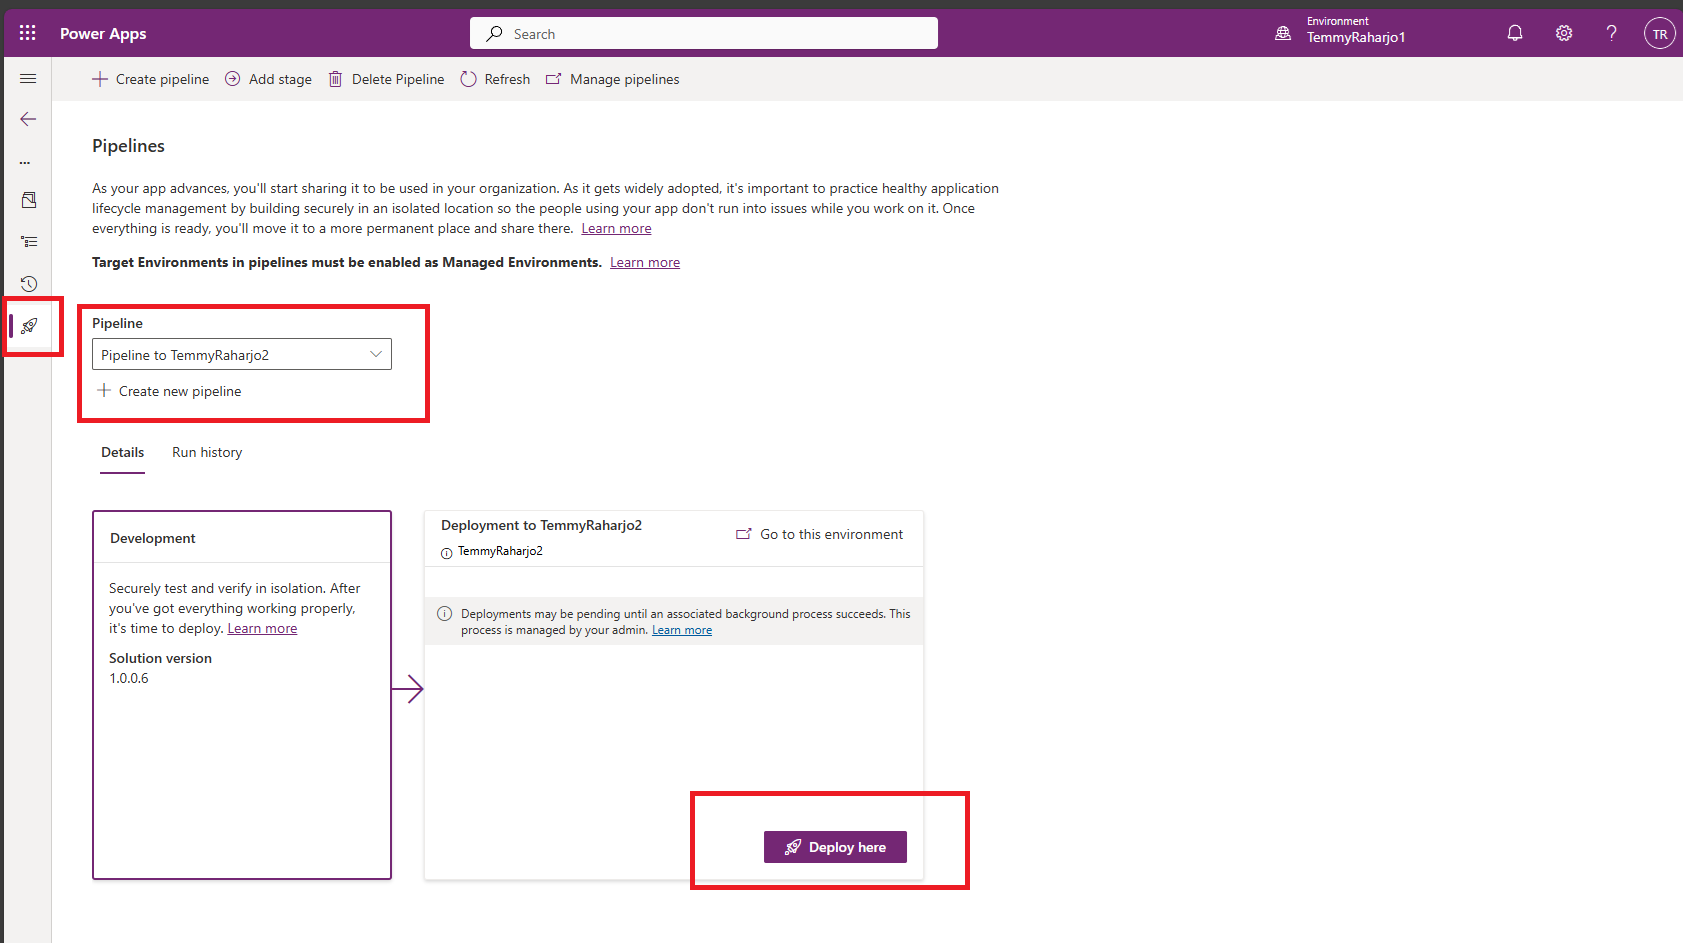
Deploy Solution
Follow the steps and "Deploy" the solution (if you notice, now we have AI to generate Deployment notes as well):
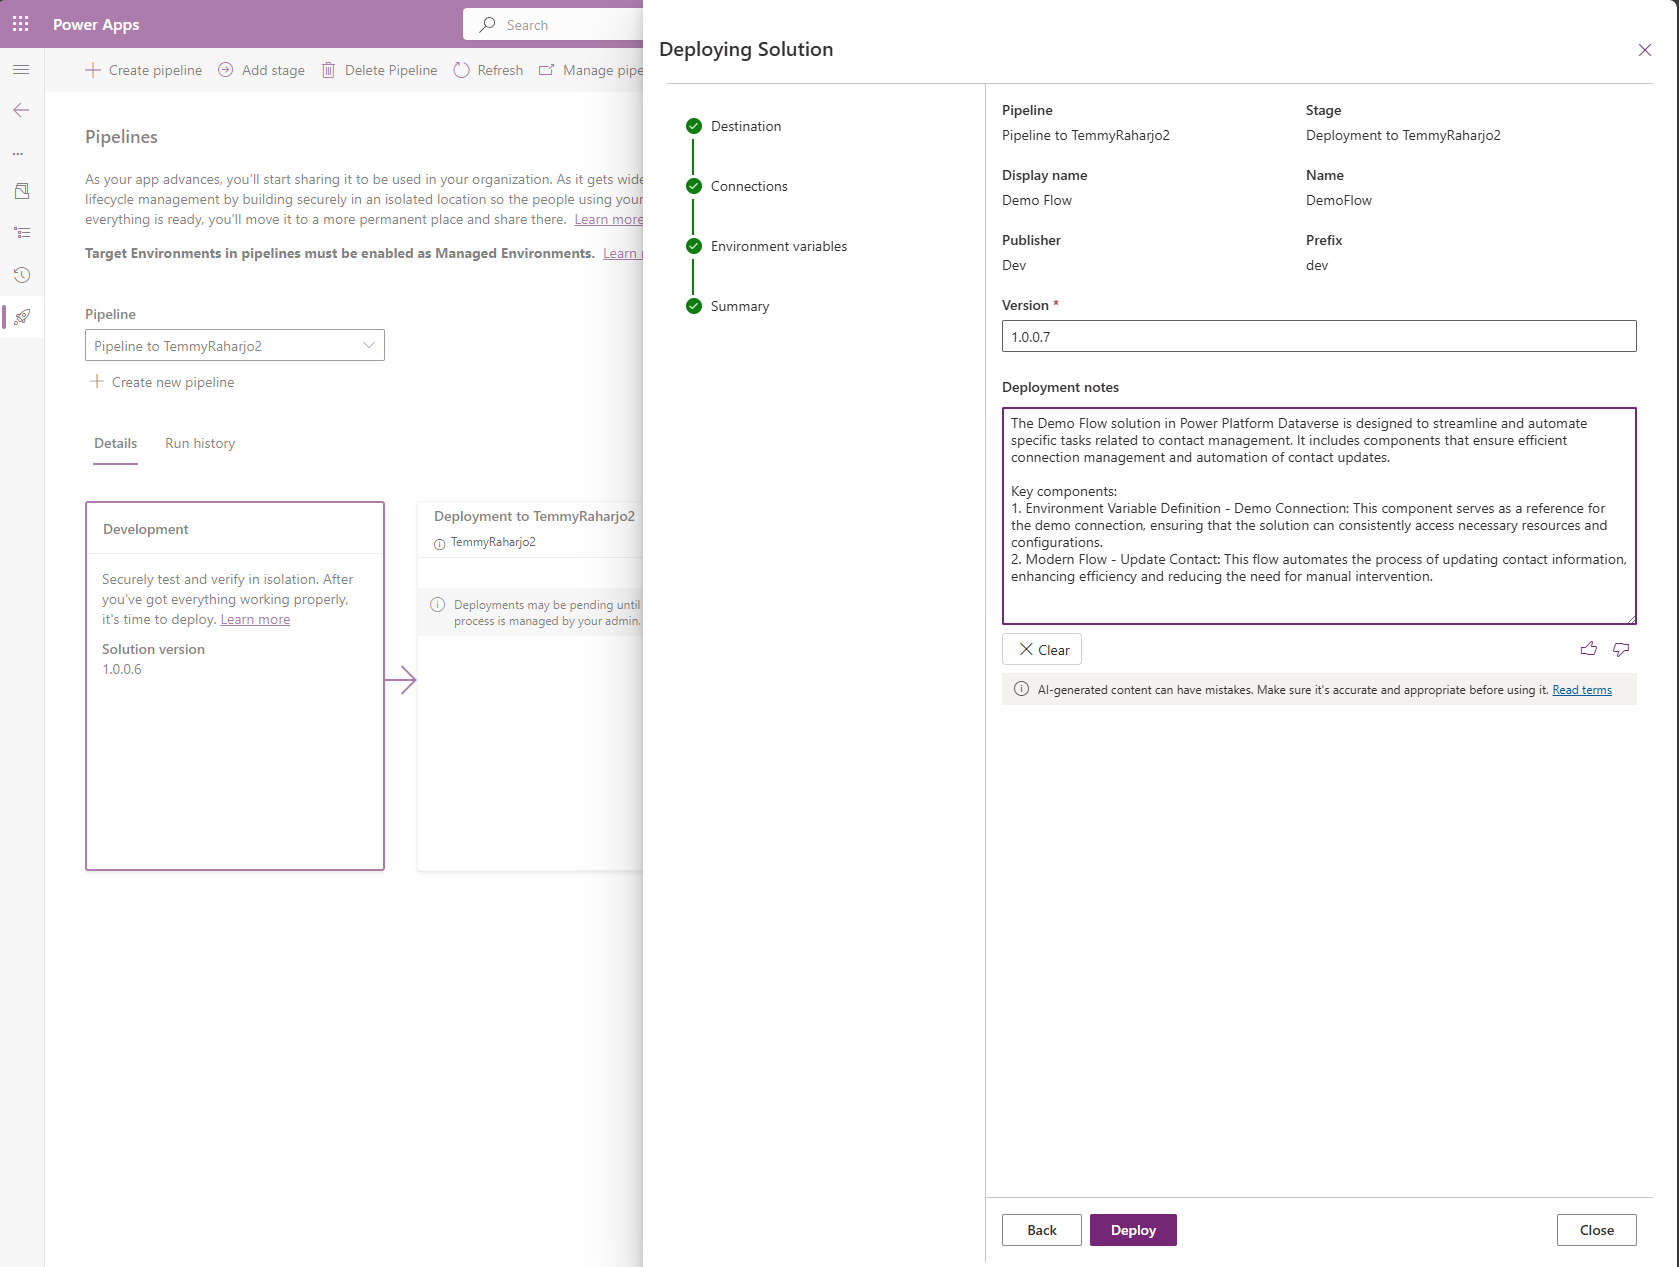
Deploy Solution
Once the deployment is successful, you can go to the Target Environment, and viola, the owner of the components will be set correctly:
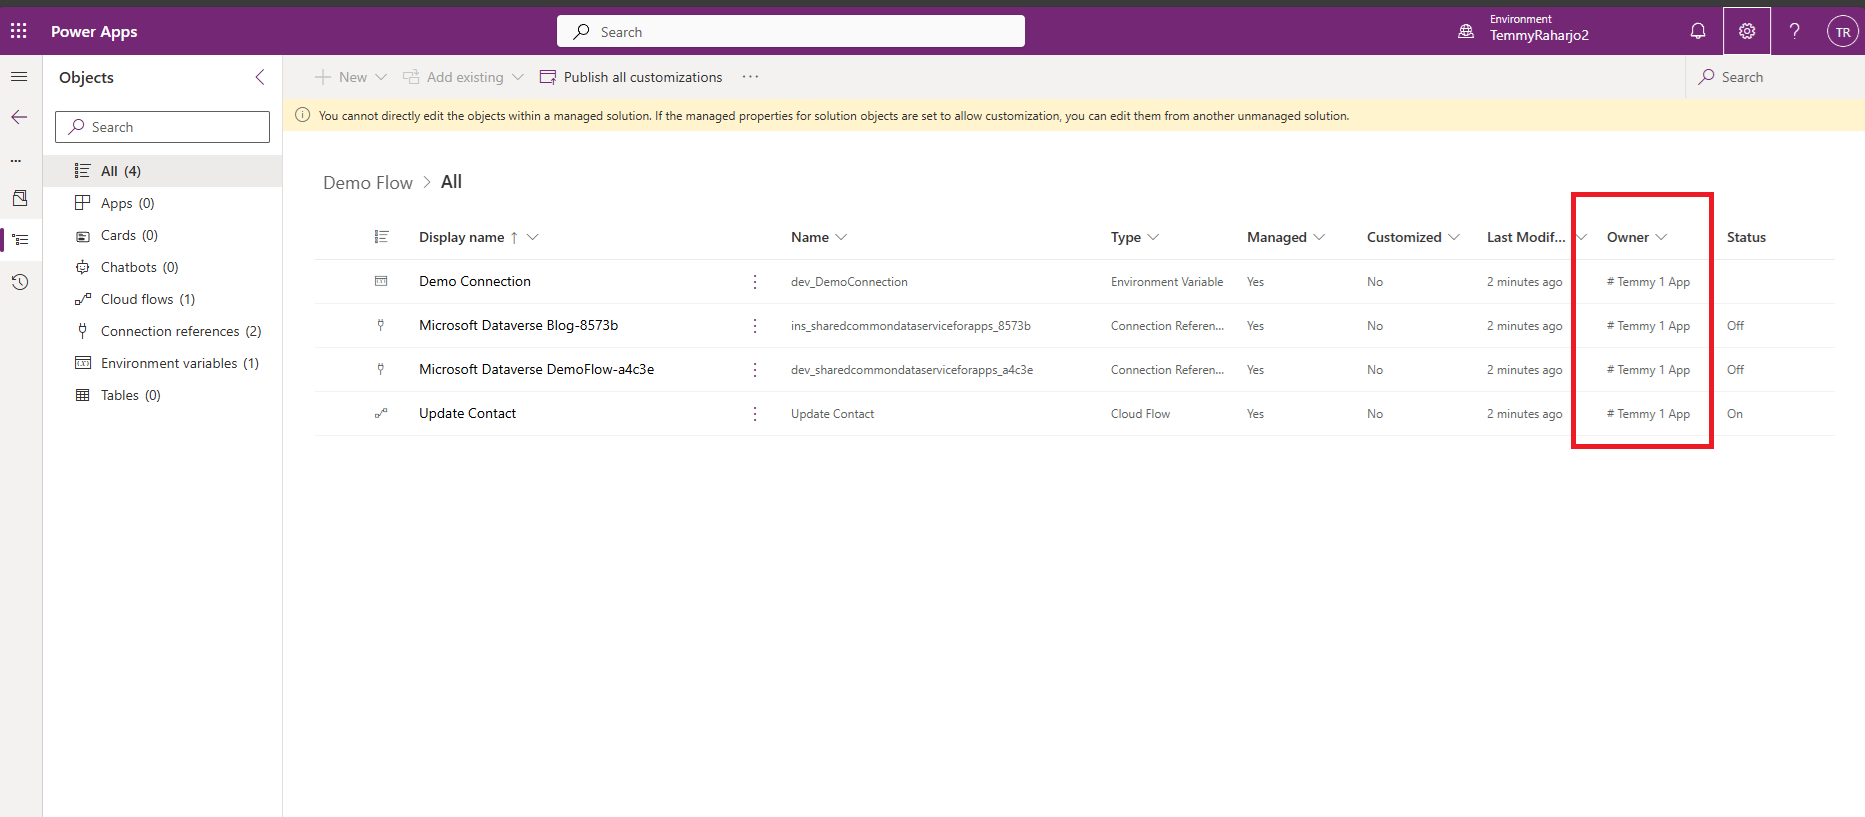
Check the owner of the components
Happy CRM-ing! 🚀🚀
Leave a comment
Your comment is sent privately to the author and isn't published on the site.