Dynamics CRM: Create API for Sending Translated Message To In-Apps Notification
Today, we will learn how to utilize Azure Cognitive Service to help us translate the message to English, create a PowerAutomate Cloud Flow as an API, and push it to Model-Driven-Apps Apps Notification (Preview).
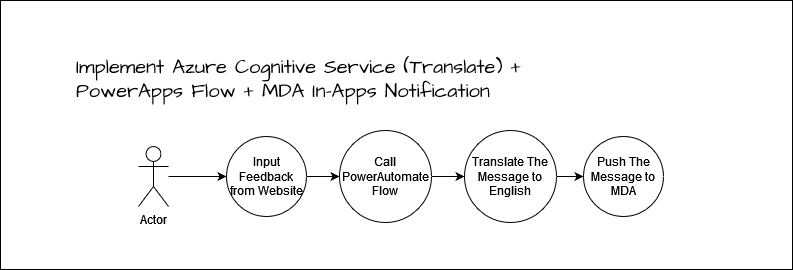 System Design
One of the scenarios that I can think of is we can implement this to make the feedback from the customer resolved as fast as possible with this design! So the idea is to let the customer fill the feedback (in any language possible) > call the API (PowerAutomate Cloud Flow) > Translate the message > push it to In-Apps Notification (in English) so everyone that use Dynamics CRM can get the message and do something about it(but for this demonstration, we only push the message without creating incident record + the message just a translated plain text).
Azure Cognitive Service
Go to portal.azure.com > Translator > hit Create button > fill in the Resource Group (Create new / Select existing), select the Resource Group region, select the Region, fill in the Name, and select the Pricing tier that you want (for the demonstration purpose, I just select Free F0). Once you have done it, you can hit the Review + Create button, and create this resource.
![]() Create a Cognitive Service Translator
Create a Cognitive Service Translator
After the Translator is created, you can go to the resource > click the Keys and Endpoint blade > copy either Key 1/Key 2and save it for the next step.
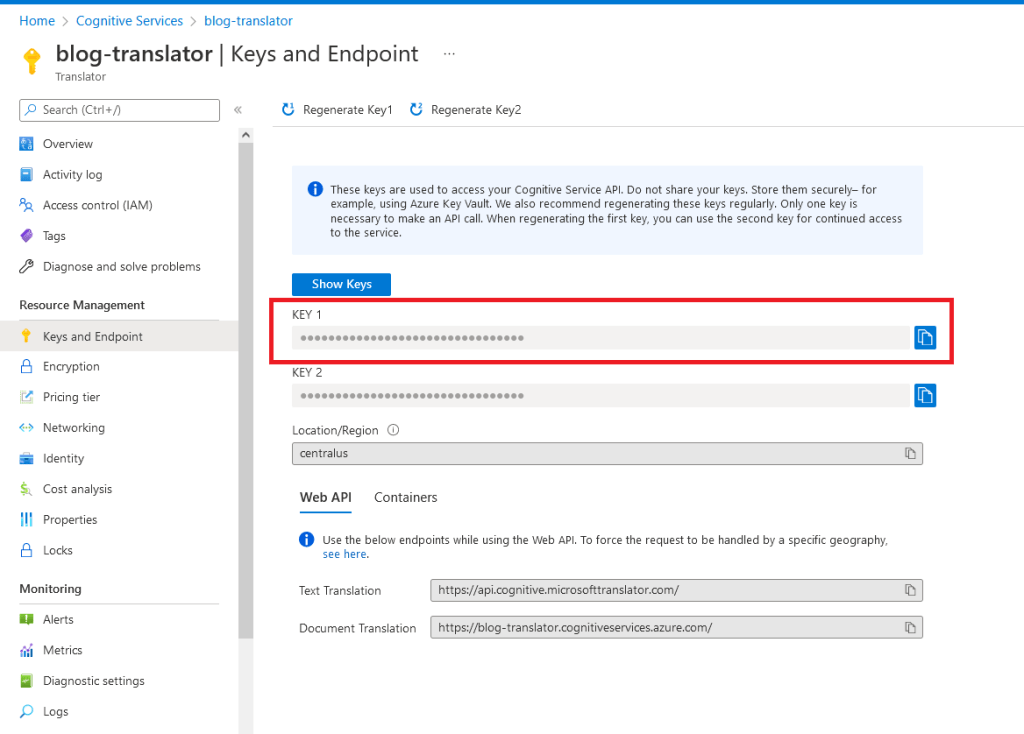 Copy the Key 1/2
Enable Model-Driven-Apps In Apps Notification
Because this feature is in preview mode, then we need to enable it in our environment. For this purpose I create a simple exe that will change the setting, and here is the code:
using System;
using System.Web.Configuration;
using Microsoft.Xrm.Sdk;
using Microsoft.Xrm.Tooling.Connector;

namespace CrmCheck
{class Program
    {	static void Main(string[] args)	{		var connectionString = WebConfigurationManager.AppSettings["connectionString"];		var client = new CrmServiceClient(connectionString);
		var saveSettingValueRequest = new OrganizationRequest("SaveSettingValue");		saveSettingValueRequest["SettingName"] = "AllowNotificationsEarlyAccess";		saveSettingValueRequest["Value"] = "true";
            client.Execute(saveSettingValueRequest);
            Console.ReadKey();
        }
    }
}
Create PowerAutomate Cloud Flow
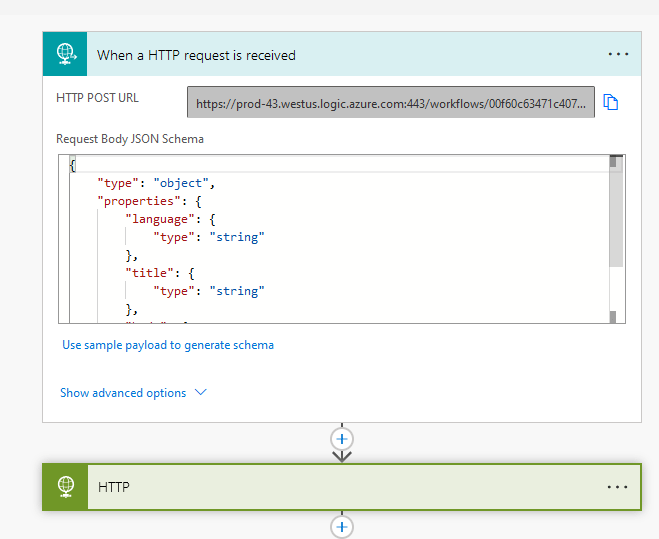
Because we want to expose it as API, we need to create an Instant cloud flow with the trigger When a HTTP request is received:
 Step 1: When a HTTP request is received
For the parameters that I will use, I submit this below JSON as the payload to generate it:
{
  "language": "id",
  "title": "Temmy itu lucu dan baik sekali!",
  "body": "Ini hanya pesan test saja ya! Jangan terlalu dianggap serius."
}
The next step is to configure how to call the translator. Because we just want to translate the message, we can use Translate API (for more information you can learn here). For the Authorization, we will use Ocp-Apim-Subscription-Key and Ocp-Apim-Subscription-Region that we need to configure in the header (for more information you can click here).
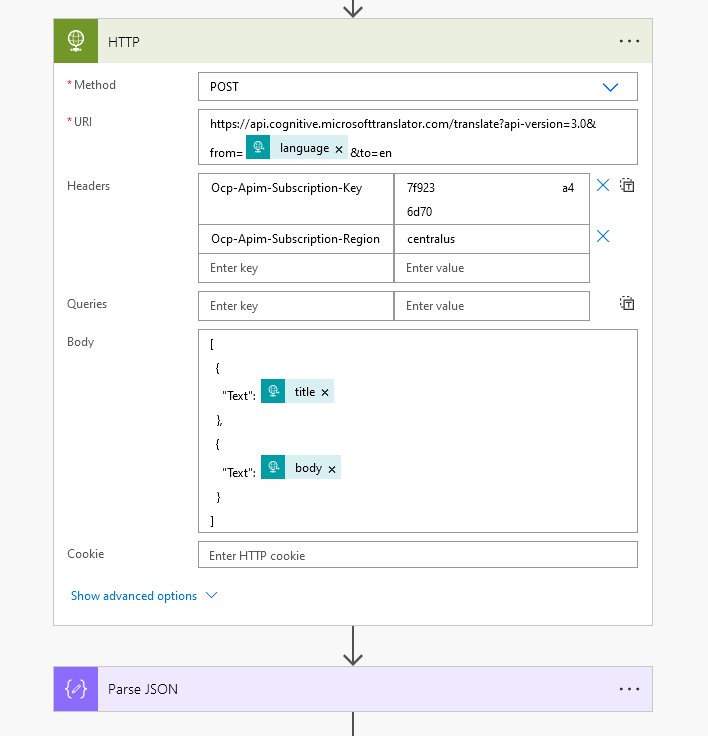 Step 2: Call Translator
We can parse the JSON and use the values for the next step. Here is how I compose the necessary value:
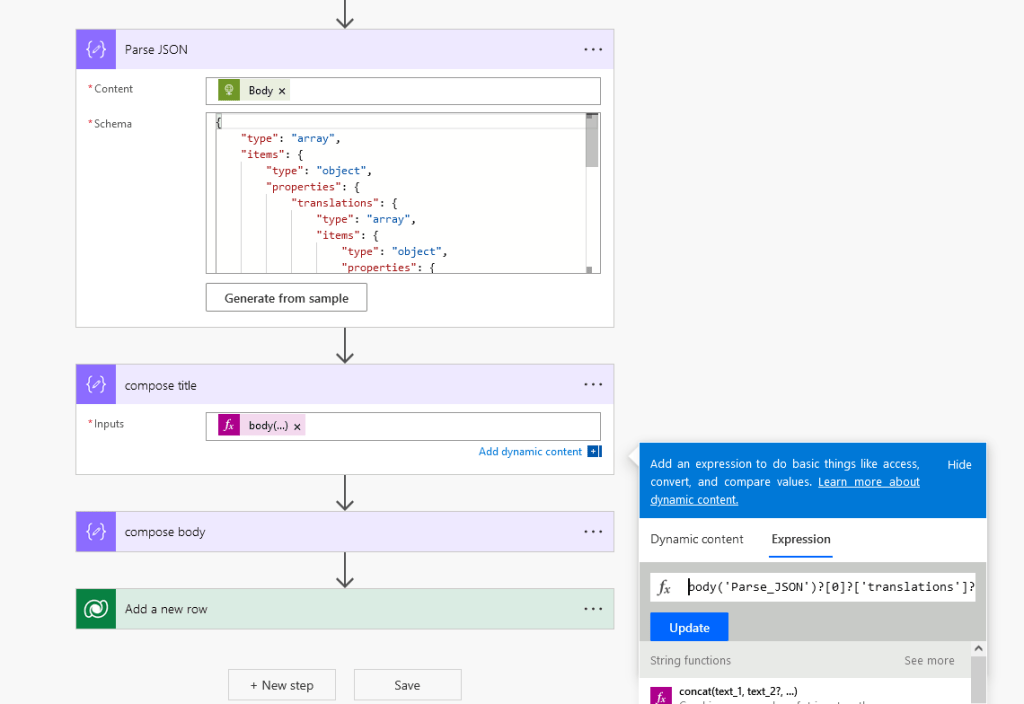 Step 3 - 5: Compose the message
Below is the sample from the Translate API:
[
    {
        "translations": [
            {
                "text": "How are you!",
                "to": "en"
            }
        ]
    },
    {
        "translations": [
            {
                "text": "Good morning world!",
                "to": "en"
            }
        ]
    }
]
Because the data is in the array, then need to use the below Expression to extract the Translated Title (you need to do the same for the Message, but need to change the index):
body('Parse_JSON')?[0]?['translations']?[0]?['text'] //Title
body('Parse_JSON')?[1]?['translations']?[0]?['text'] //Message
The last step is to create a record in the Dataverse:
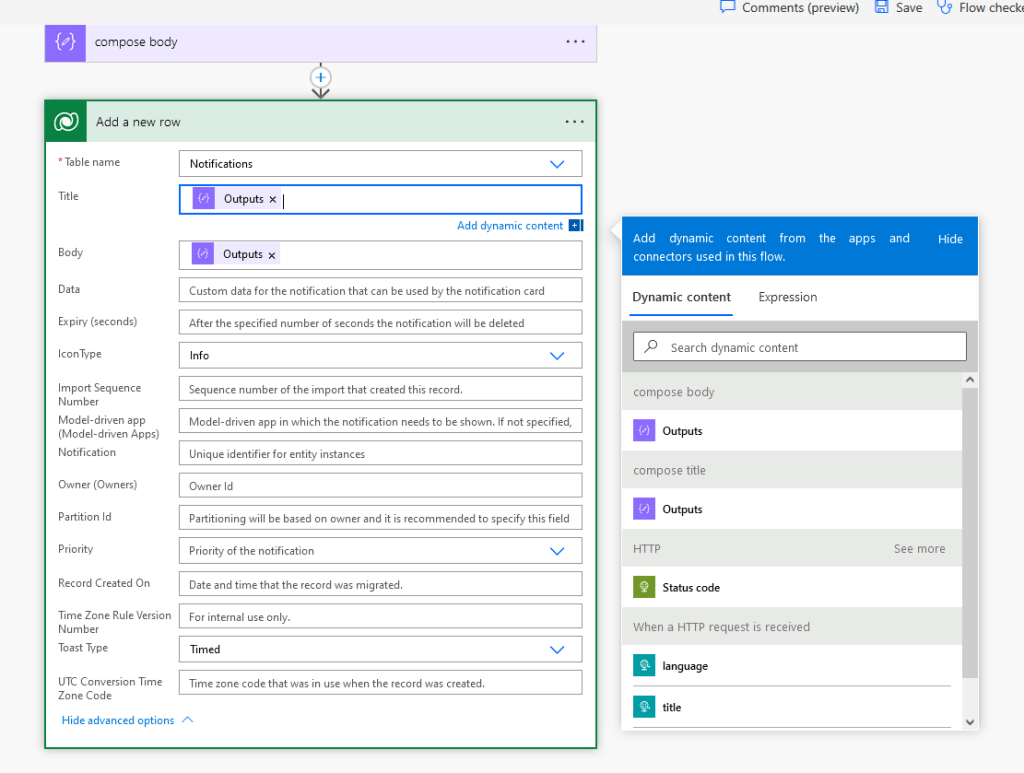 Step 6: Create a Dataverse record
With all the steps above, our cloud flow is ready to be used, and here is the result:
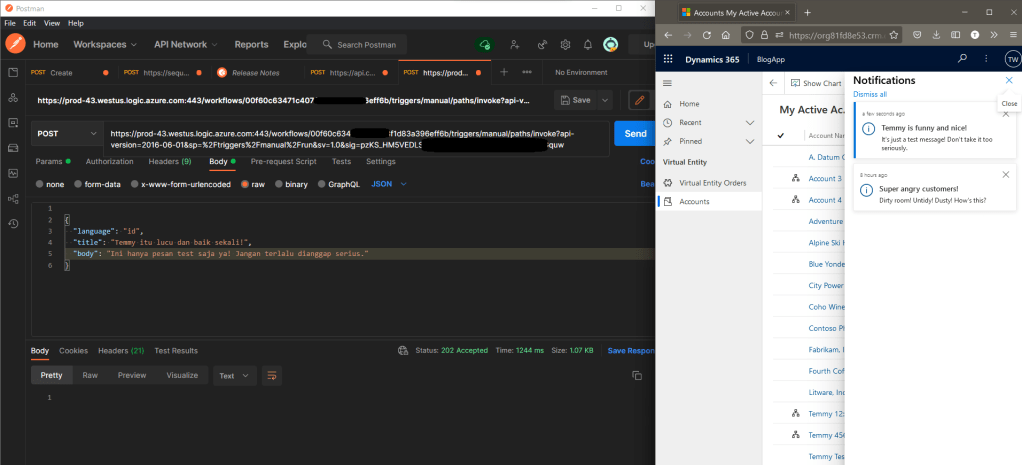 The result
Happy CRM-ing!
Leave a comment
Your comment is sent privately to the author and isn't published on the site.