Customer Insights: Rendering Marketing Form using React App
Have you ever used the default Customer Insights - Marketing Forms? If yes, you will notice that the default URL generated is random:
https://{server-load}/{organizationid}/digitalassets/forms/{msdynmkt_marketingformid}
In the eyes of us tech-savvy, we probably don't really think of the URL as a problem. But, for the others, they might think that the URL is kind of fishy, and they can't authenticate the owner of the URL. Luckily, Microsoft is allowing this page to be wrapped by another site, which will serve as the theme for today's blog post (the GitHub repo is provided at the bottom of this post). Let's learn!
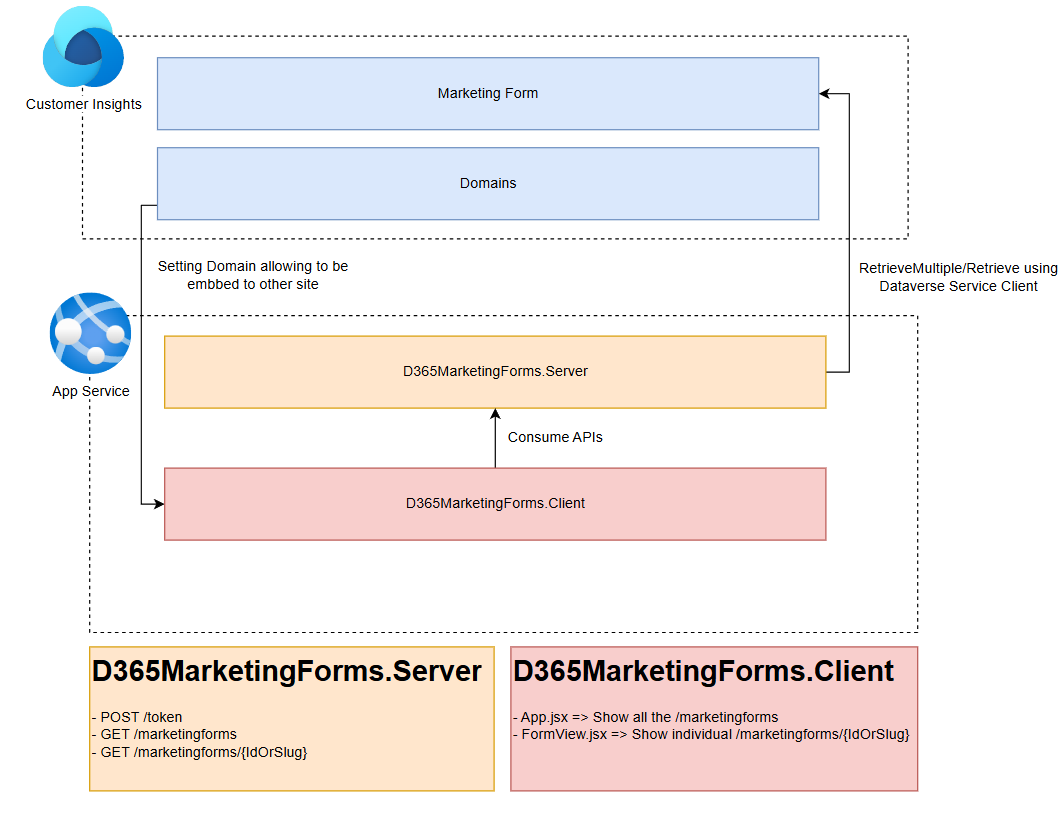
System overview
Set Marketing Form
Before we begin with the technical stuff, we need to prepare the form. On your Customer Insights - Journey App, go to Real-time journeys > Forms > create new form:
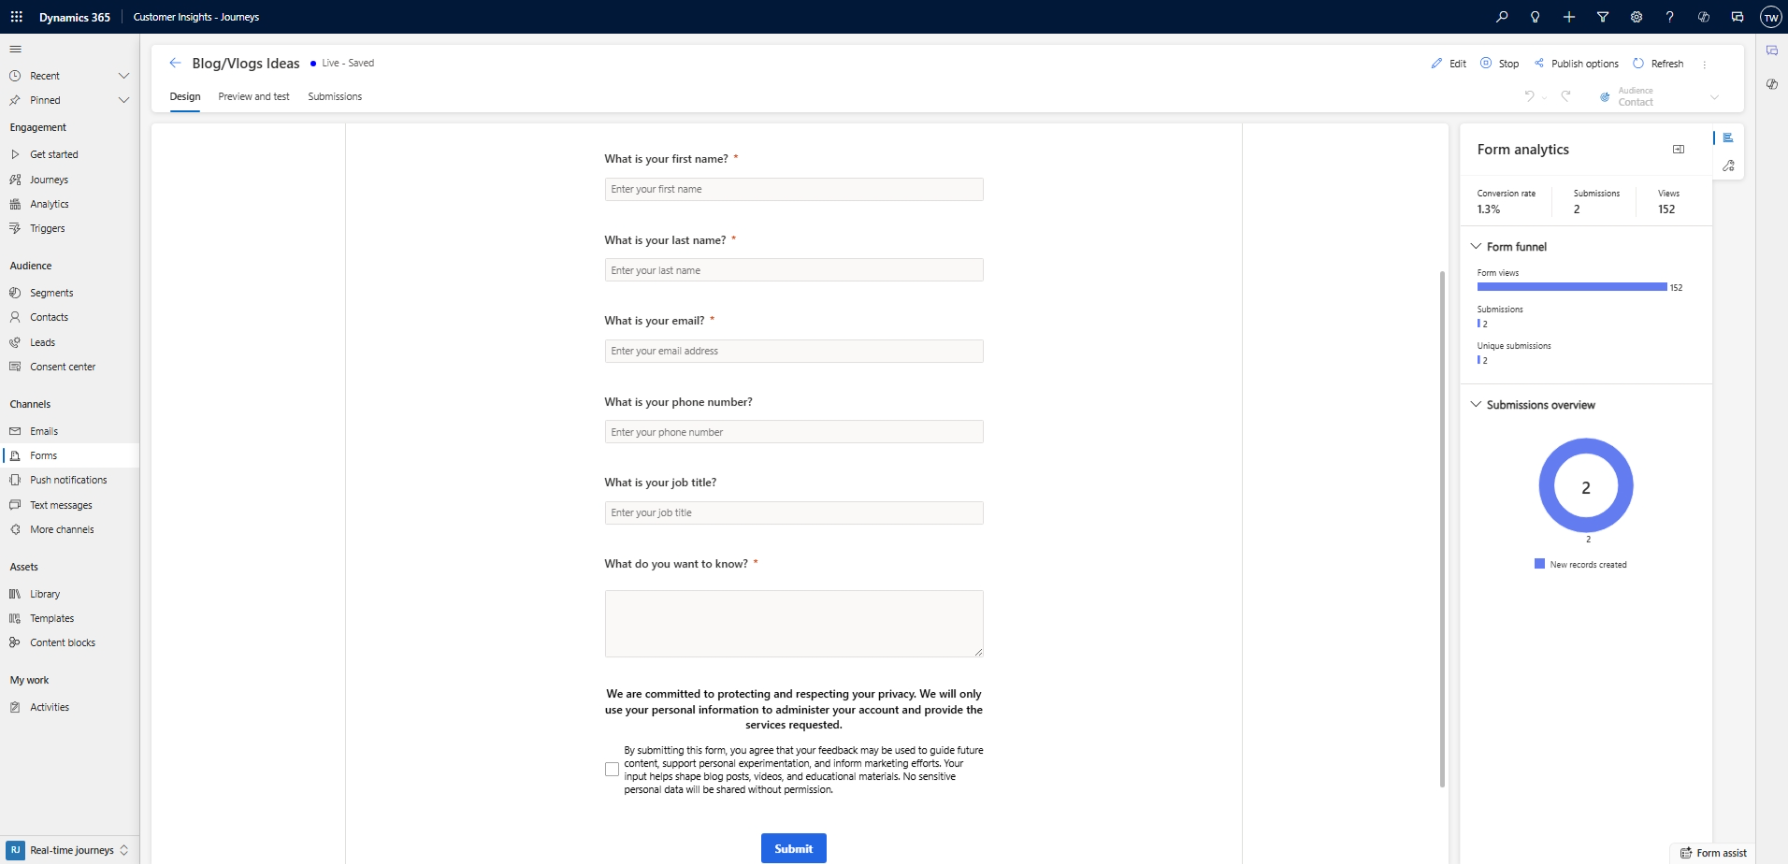
Marketing Form
Once you have created the form, you can save and publish the Form.
Custom Portal
Next, I created a new Visual Studio solution project and used the template "React and ASP.NET Core":

React and ASP.NET Core template
D365MarketingForms.Server
For this project, I set it to .NET 9 and installed two extra NuGet packages:
The structure of the project:
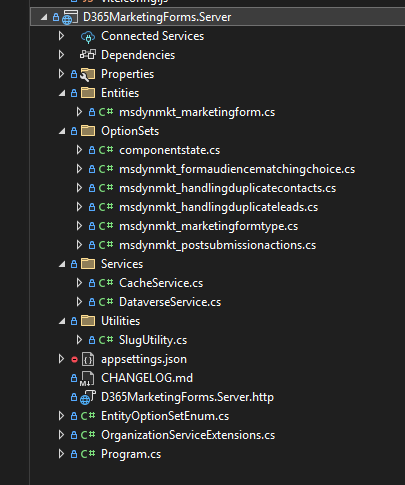
C# Project structure
If you can see the above, the Entities and OptionSets are part of early-bound (generated by PAC CLI). And for the first iteration, we only need to retrieve the msdynmkt_marketingform table (to retrieve the data).
For the functionality, in the Program.cs, you can see the implementation of:
- POST /token: to generate the token using API Key (to authorize the client).
- GET /marketingforms: to retrieve all msdynmkt_marketingform where statuscode = Live AND msdynmkt_standalonehtml is not null and msdynmkt_marketingformtype = Marketing Form
- GET /marketingforms/: to retrieve the msdynmkt_marketingform based on the msdynmkt_marketingformid/msdynmkt_name.
D365MarketingForms.Client
For the client side, from a technical perspective is actually not that complex. We only need to:
- Maintain the token (for authorization purposes)
- Call the /marketingforms and display all the form names (also create the link based on the slug) on the homepage.
- Call the /marketingforms/ to show the individual form.
Deployment - Azure App Service and Web App
Both of the projects (Server and Front End) are deployed to a single Web App (automatically will be handled by the Template - I guess). You just need to click on the .NET project > Publish > then you will need to select the subscription > create the Azure App Service and Web App. I chose the Linux-B1 to deploy, and once the Publish Profile is ready, you just need to deploy.
You can go to your Web App > Settings > Environment variables, and you can add all the Environment variables needed and click Save:

Environment variables
Add Custom Domain
If you have a custom domain, you can add custom domain to be used as the link to our portal!
To add a custom domain to our Web App. You can go to Settings > Custom domains > Add the "Add custom domain". Because I'm not using Azure Service Domain, I chose the All other domain services and set the TLS/SSL certificate to "Add certificate later":
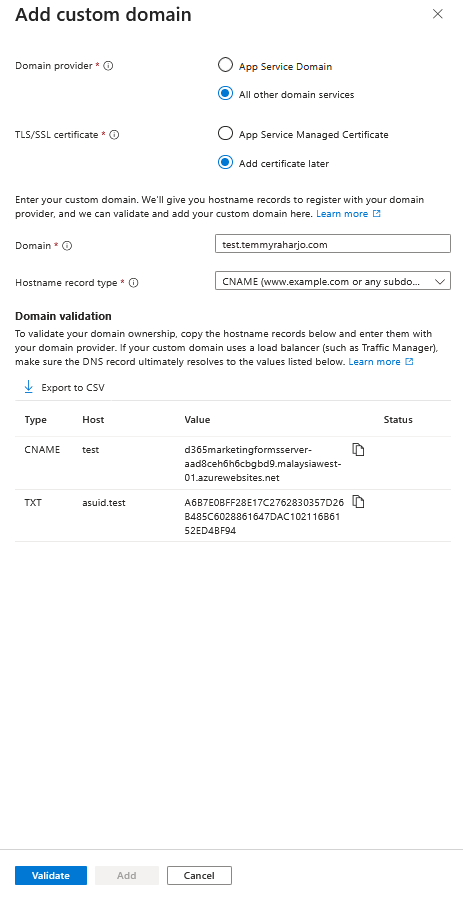
Add custom domain
Based on the above information, you need to verify it with your Domain provider. For this part, it can be different for each Domain Provider. Here is the sample on my domain provider, where we need to add both the CNAME and TXT:
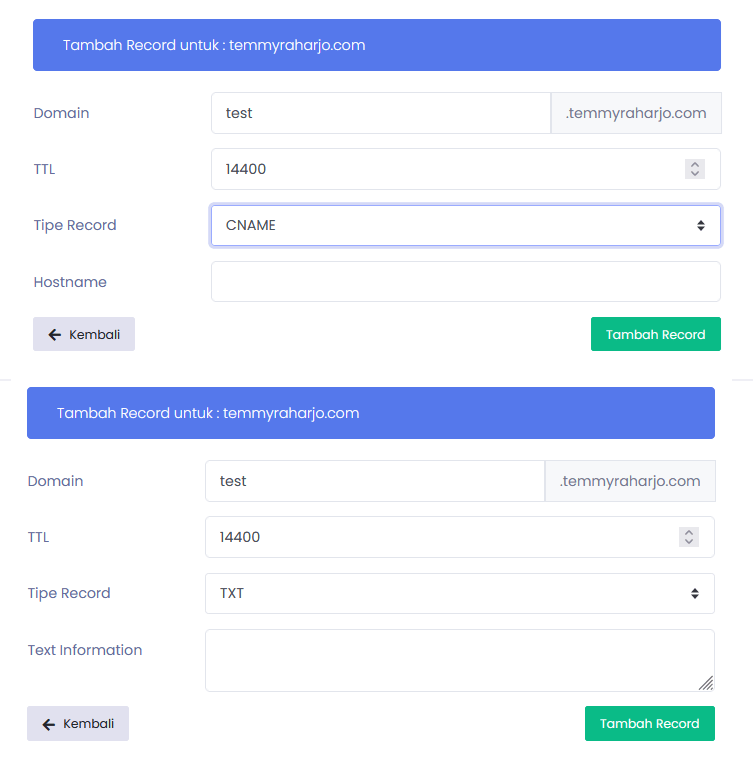
Add CNAME and TXT to your domain provider to validate your domain ownership
Next, you need to click the Validate button on the Azure - Add custom domain page.
And with this step, you should be able to access the Portal Site with your domain. But, because we have not yet whitelisted the custom domain, you will get the following error when we try to load the Form:
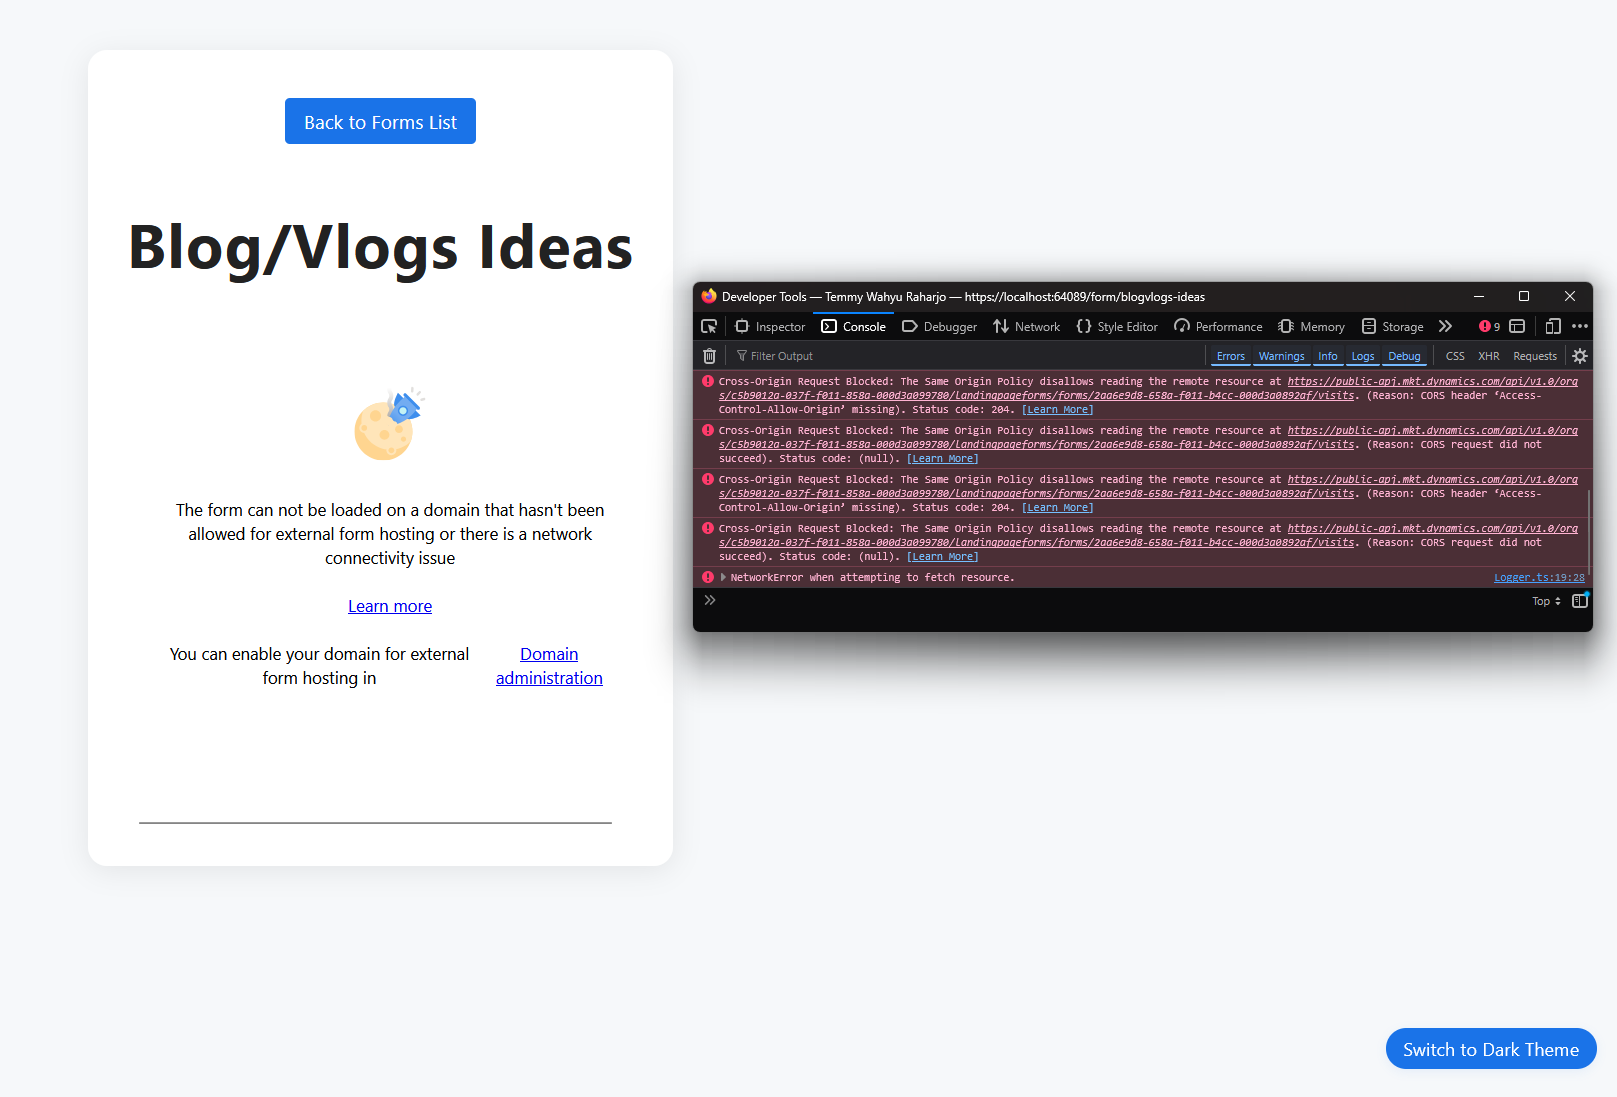
Error when loading the form
The error in the console:
Cross-Origin Request Blocked: The Same Origin Policy disallows reading the remote resource at https://public-apj.mkt.dynamics.com/api/v1.0/orgs/xxx/landingpageforms/forms/2aa6e9d8-658a-f011-b4cc-000d3a0892af/visits. (Reason: CORS header ‘Access-Control-Allow-Origin’ missing). Status code: 204
That is why we need the next step to register the domain!
Customer Insights - Domain
Last, you need to open your Customer Insights - Journey App > go to Settings > Email Marketing section > Domains. You need to add your domain and set "External form hosting" as checked:

Add a new domain
Just click the Add button and you're done. For example, these are all the domains that I added for this demo purposes:

Domains that I registered
Once you register the domain, you will see that the Form can be loaded from the browser:
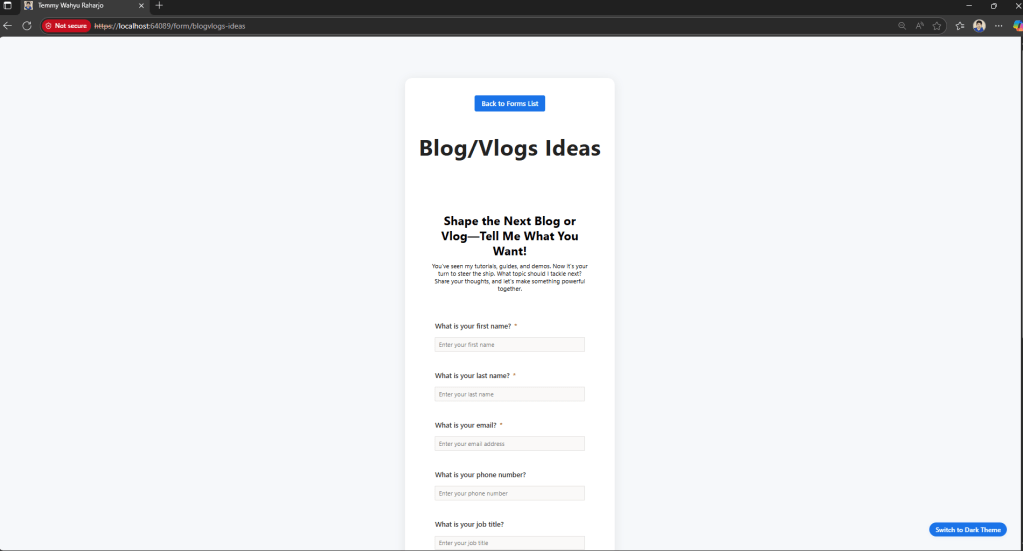
Form successfully loaded
Summary
Here is the GitHub repo for the project:
GitHub Repo D365MarketingForms
And for the live demo, you can go to:
Happy CRM-ing! 🚀
Leave a comment
Your comment is sent privately to the author and isn't published on the site.