Using PowerFX with commands for cloning records with N to N relationship
Today we will learn how to create a command bar to clone a record with many-to-many relationships. For those who don't know, in Model-Driven-Apps, we can create a command bar (previously known as "ribbon button") that uses PowerFX (low code) query.
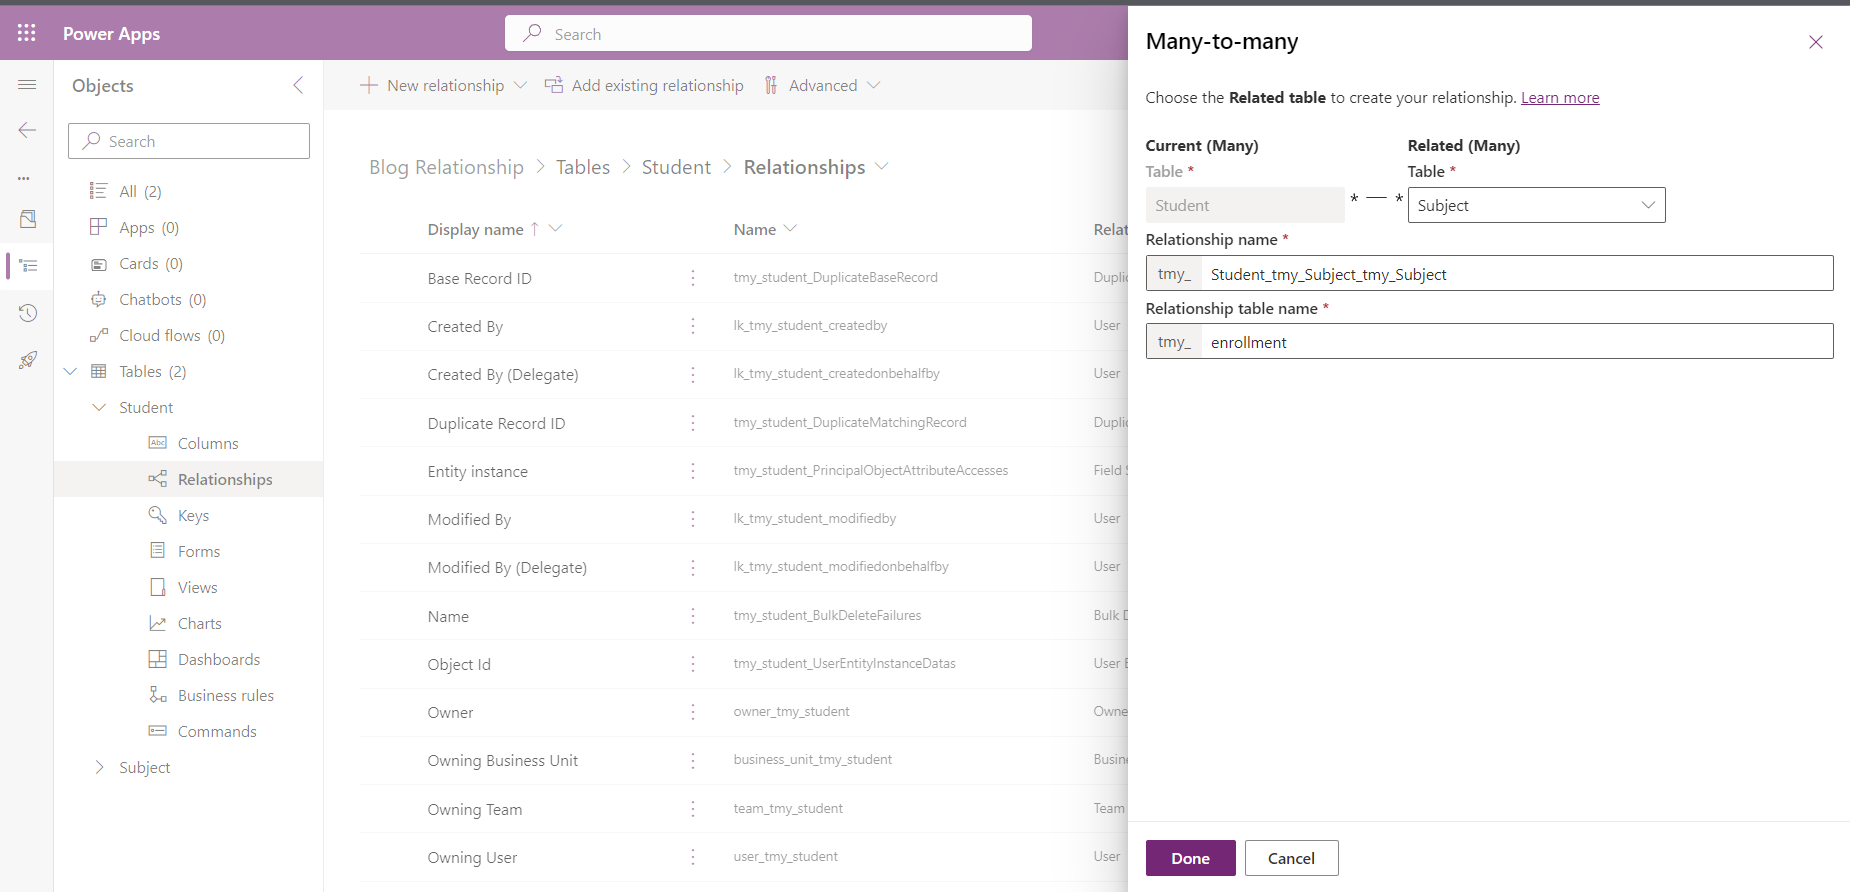
First, I created 2 tables for the demonstration (Student and Subject). Then, I created many-to-many relationships between those tables like in the picture below:
Next, you can edit your MDA (Model Driven App) and initiate the command designer (for detailed implementation you can click here):

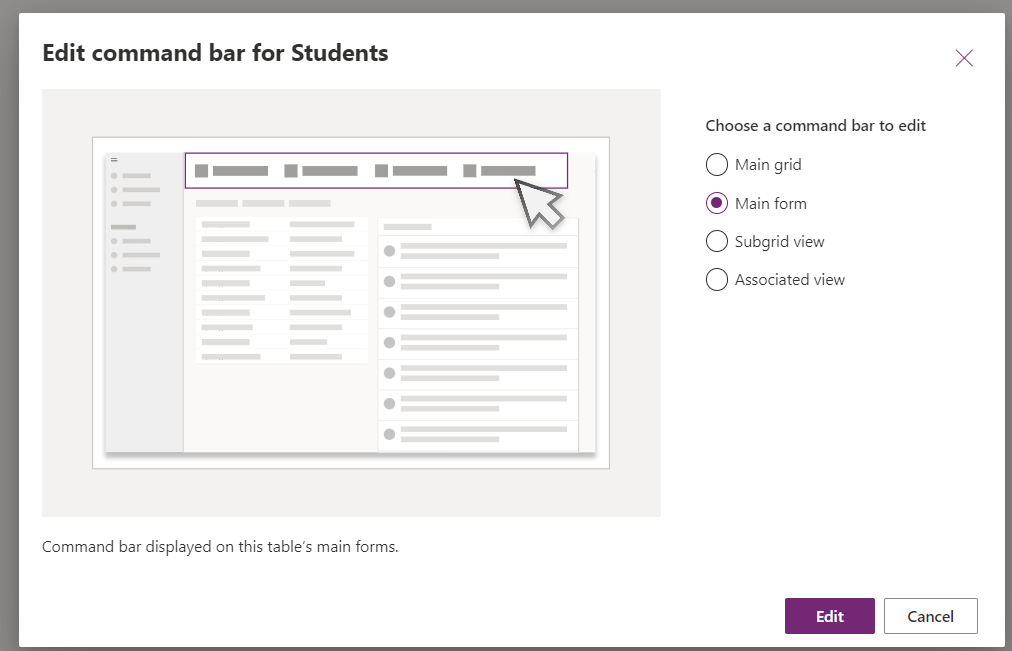
A new dialog will appear, and you can select which command bar that you want to create. For this demo, I will select "Main form":
Next, you can choose which kind of customization that you like. For this demo, I select the Power FX:
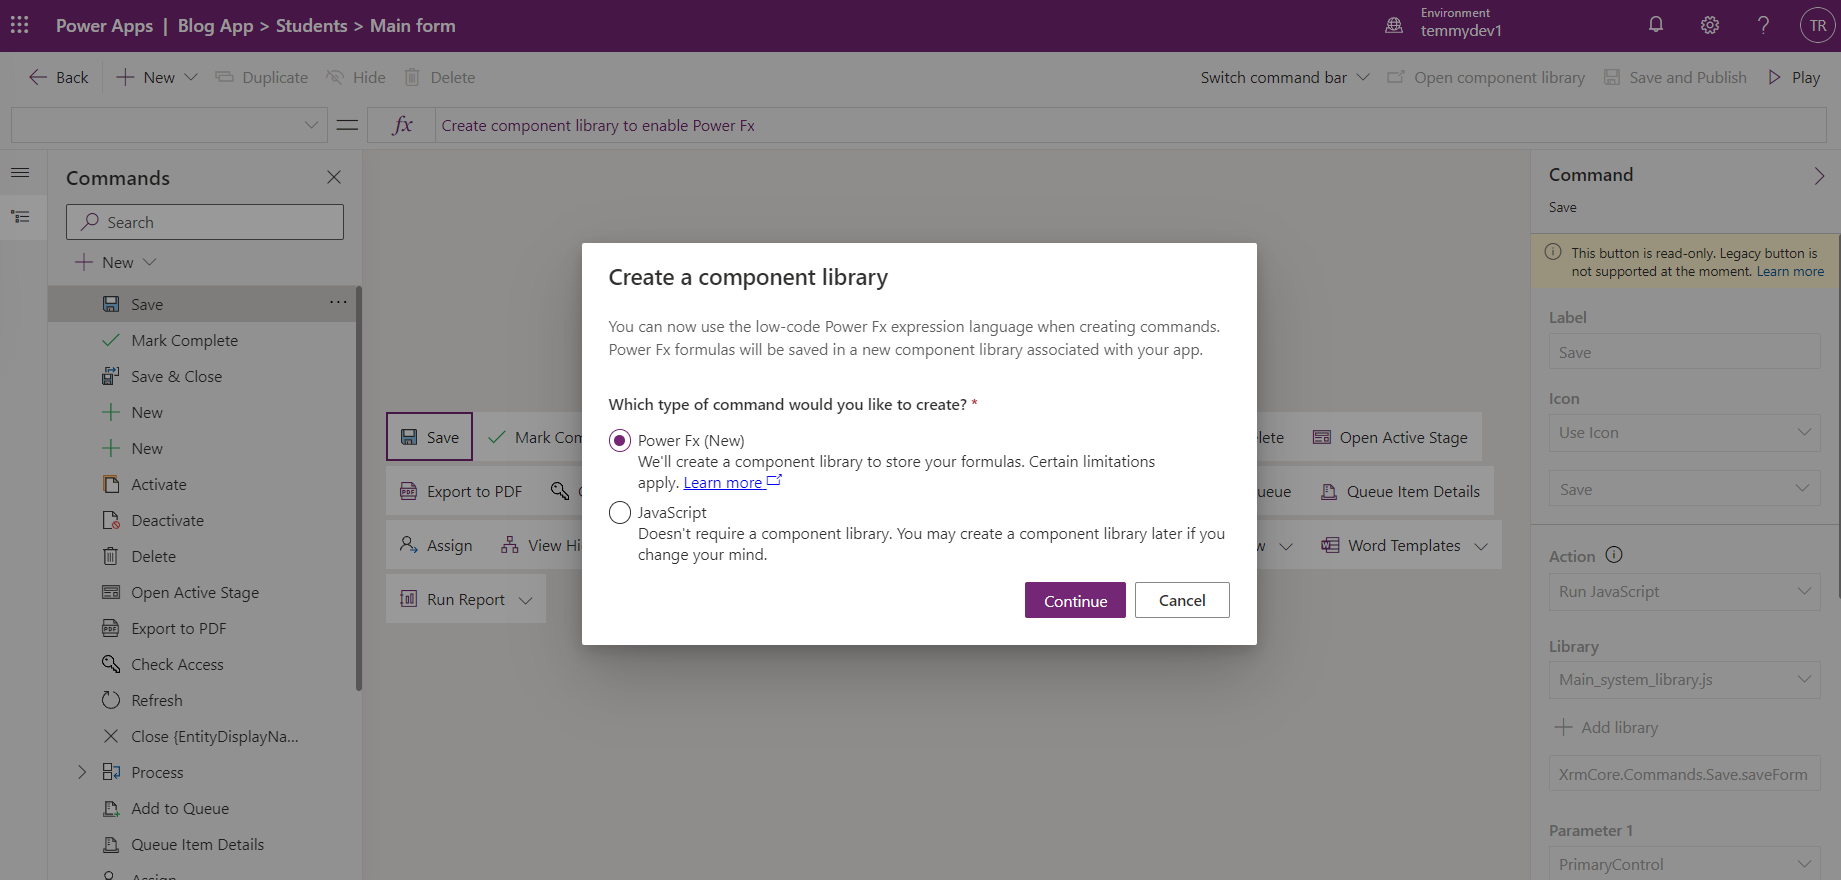
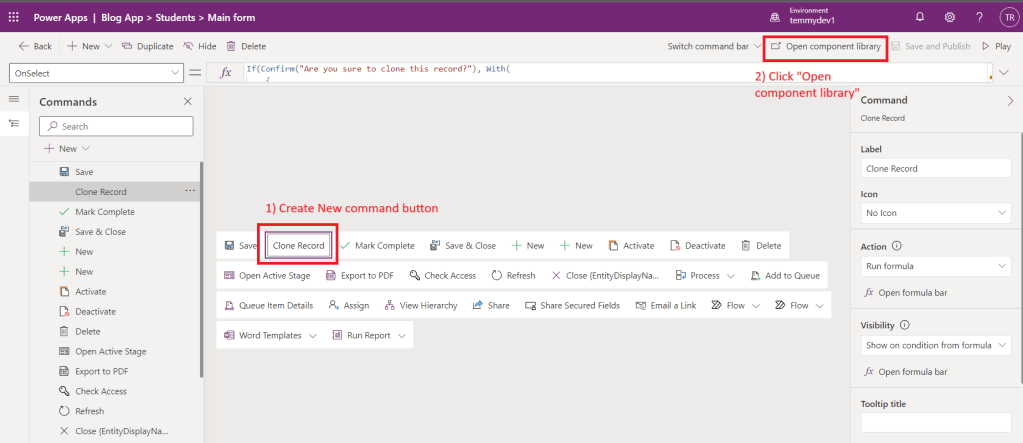
Once the Command Designer is loaded, you can create the button that you want. Here, I created a button with the label name "Clone Record". As we need to enable advanced settings, we need to click "Open component library":
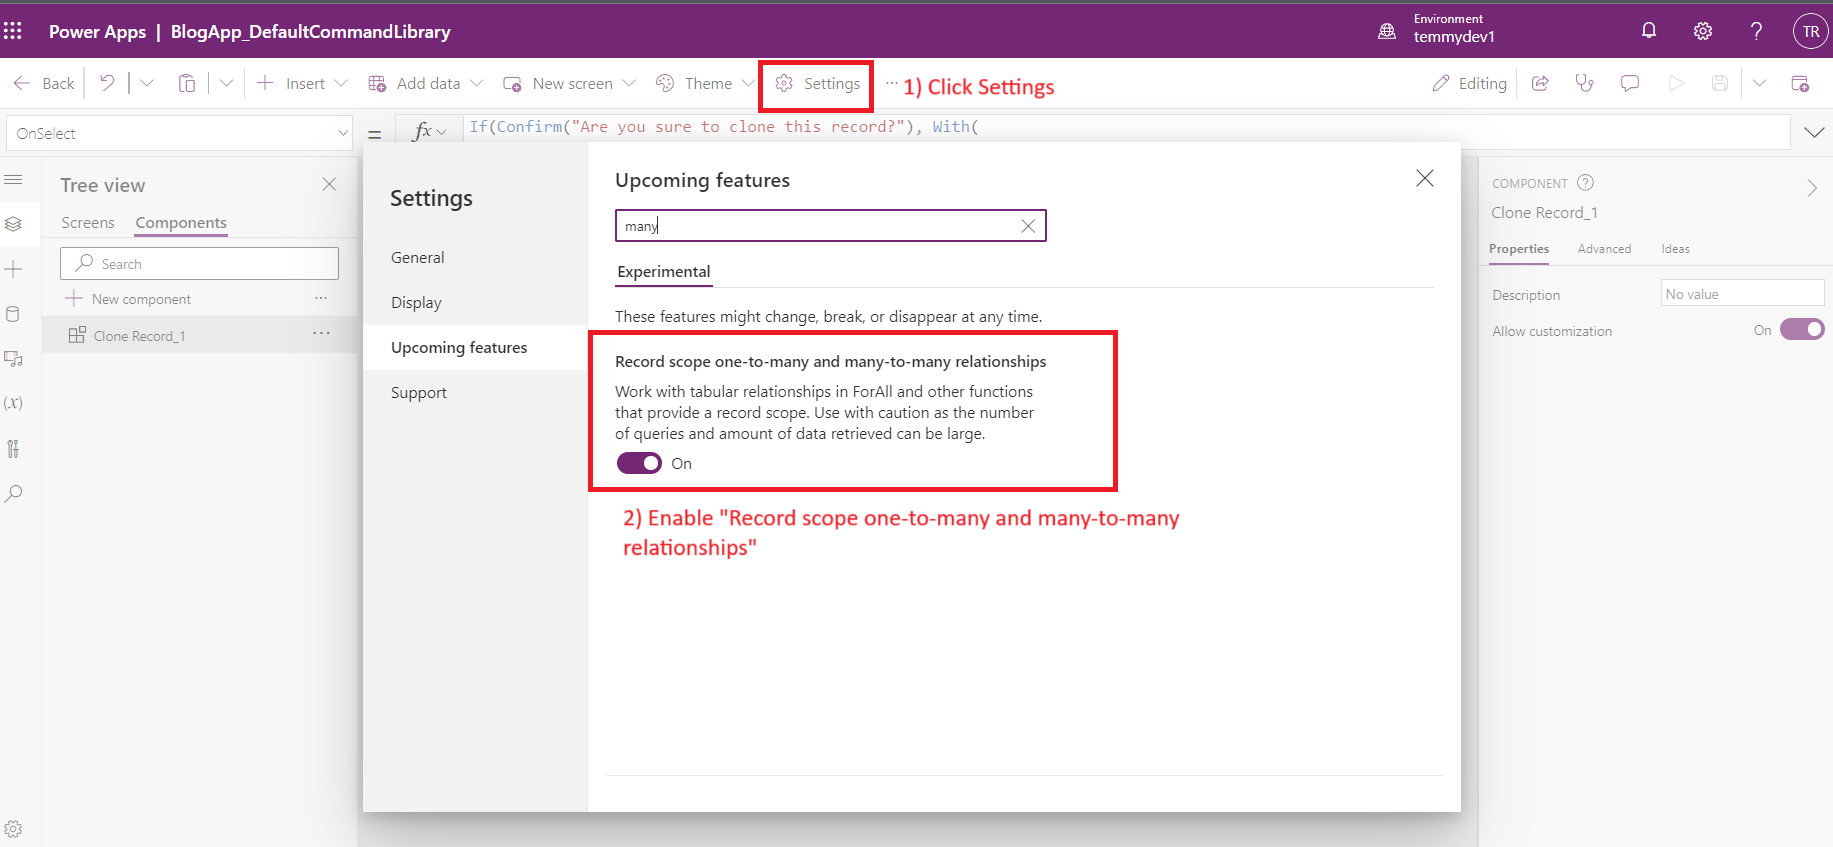
Based on the information that I learned from Flow Joe in this YouTube video, we need to click "Settings" > go to "Upcoming features" > "Experimental" > Enable "Record scope one-to-many and many-to-many relationships":
Once this is ready, we can focus on the logic to "clone" the record:
If(Confirm("Are you sure to clone this record?"), With(
    {
        newStudent: Patch(Students, Defaults(Students), { 'Full Name': Self.Selected.Item.'Full Name' & " (Copy)" }),
        allSubjects: Self.Selected.Item.Subjects
    },
    ForAll(allSubjects, Relate(newStudent.Subjects, ThisRecord)); Navigate(newStudent))
)
As you can see in the above code, we use the Confirmmethod to give a dialog for the user to select. If the user approves it, then we will use the Withfunction to give variables scope and formula that we want to run. For this purpose, we will be passing:
- newStudent: To create a new Student record, we can use the **Patch**function (which can be used to create a new record if we pass the default data source). Because I want to keep it simple, the property that we need to pass is just the "Full Name" and we add the literal string "(Copy)" for it.
- allSubjects: get all the original record's Subjects
Last, we need to loop all the allSubjects. For making an association (N-to-N) between the new record and the allSubjects, we need to use the **** Relatefunction. The final part is to Navigateto the new record data.
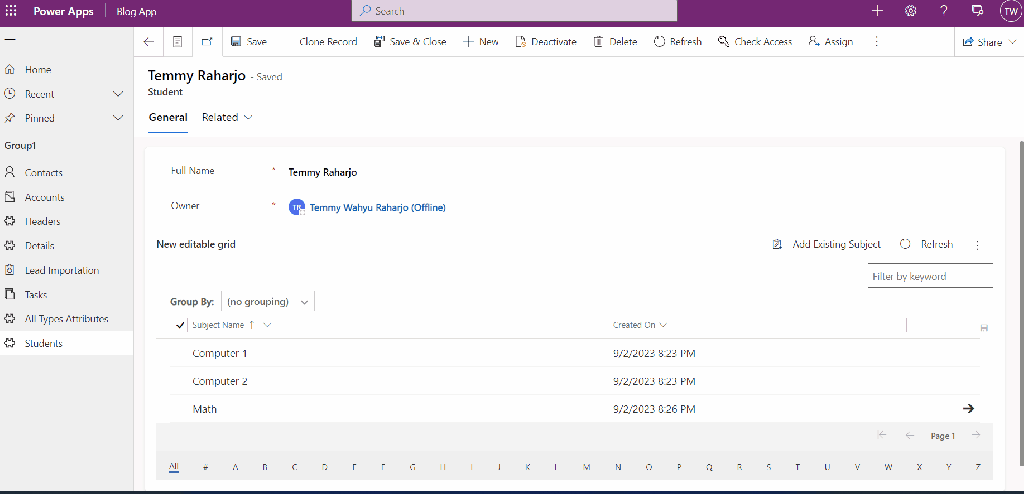
Once you are done, you can click save and publish. Here is the demo:
Happy CRM-ing!
Leave a comment
Your comment is sent privately to the author and isn't published on the site.