How To Consume Microsoft Graph Using Power Automate
Microsoft Graphis a collection of APIs that enable us to access data in the Microsoft Cloud platform. There are lots of useful APIs that we can play with to connect the dot from 1 application through another. For example, we can get data for Users, manage Calendars, etc. Today, we will learn how to consume Microsoft Graph API using Power Automate. For the demonstration purpose, we will call List user API.
Create App Registration
The first thing we need to do is to create App Registration in our Azure AD. Go to portal.azure.com > Azure Active Directory > App registrations blade > click New registration button.
 Create an App in Azure AD
Once the page loaded, give the app Name> select ***Accounts in this organizational directory only..***option > click Registerbutton.
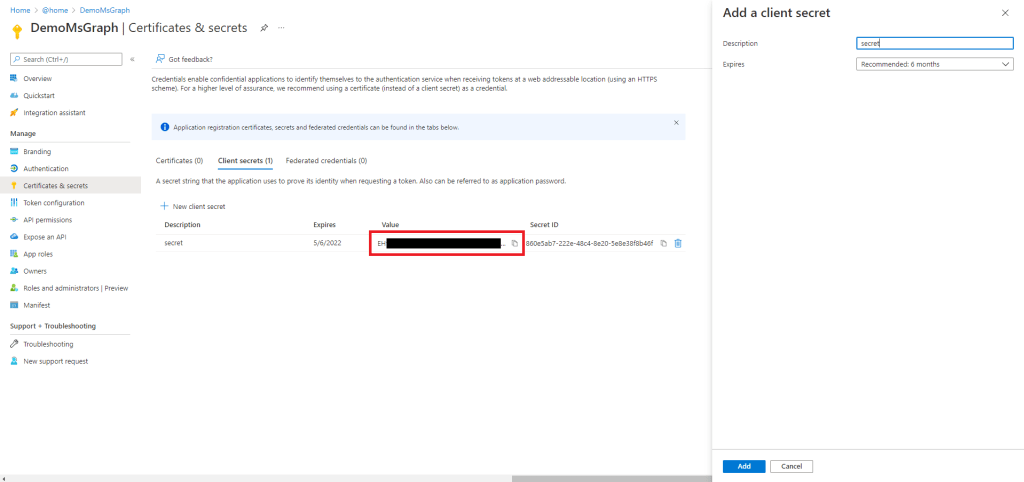
Then we can go to Certificates & secrets blade > New client secret button > fill in the Description> click Add button.
 Create Secret
Once the saving process is done, you need to copy the Secret's Valueand save the value for later use.
The next thing is to assign the API permissions. Because we will call List user API, we need to add either one of these roles: User.Read.All, User.ReadWrite.All, Directory.Read.All, Directory.ReadWrite.Allpermissions.For more detailed information, you can click this link. (Updated7 Nov 2021: Thanks to Bipin Kumar for pointing out the correct setting for this).
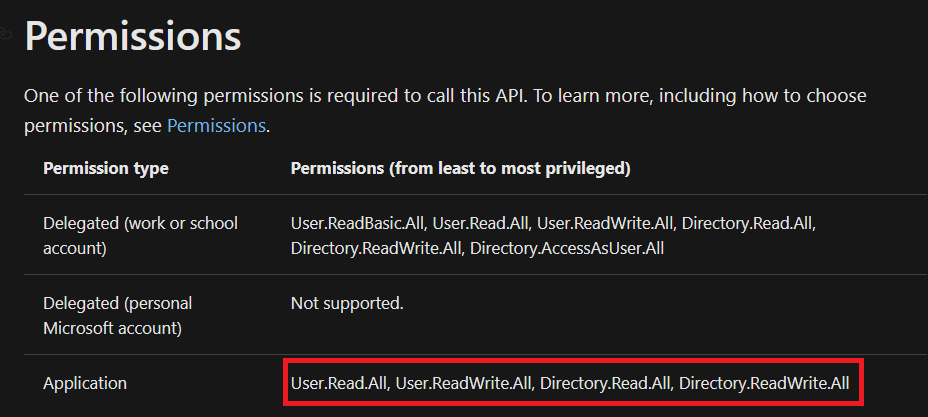 Picture taken from MS documentation (List User page)
To set this, we need to go to API permissions blade > Add a permissionbutton > select Microsoft Graph> then we need to choose Application permissions because we will use the server to server Authentication + Authorization > then we need to select the permission required (I select User.Read.All).
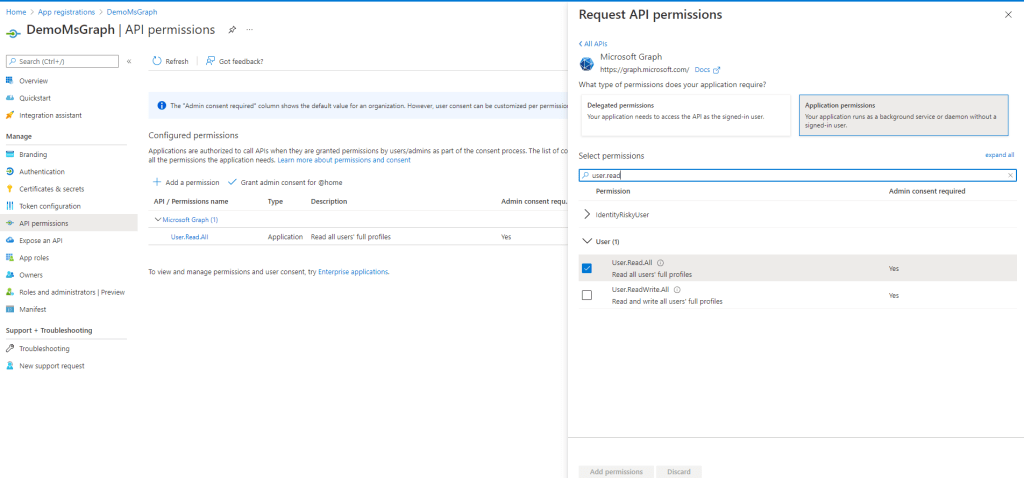 Set Permissions
Once we set it, we need to click the ***Grant admin consent ...***button. The purpose of this step is to make sure that the Application is authorized as Admin.
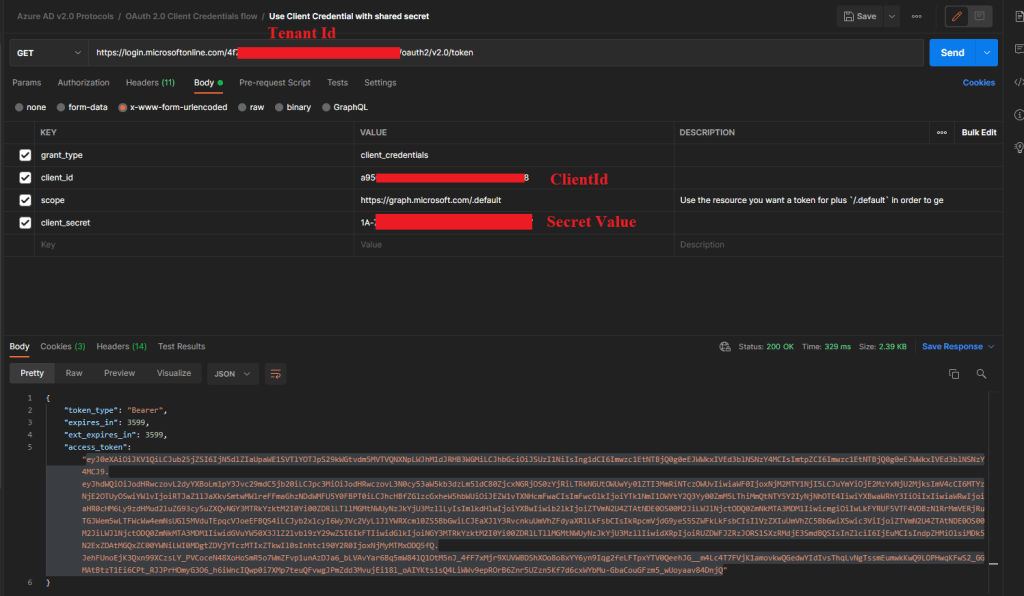
Once we can go to the Overviewblade to get all the information we need (Application /Client Id, Tenant Id) to be used in the next step.
Testing The Authorization Using Postman
To get the access token, you can import this collection. The one we will use is **** theUse Client Credential with shared secret(in the folder OAuth 2.0 Client Credentials flow). In this request, you just need to set the TenantId, ClientId, and ClientSecret. Below is my sample when I testing it:
 Postman request to get access token
We can verify the access token that we get from the above in the jwt.mspage. We just need to copy the access token and paste it there to see if our setup earlier is correct. Below is the sample if we successfully setup it:
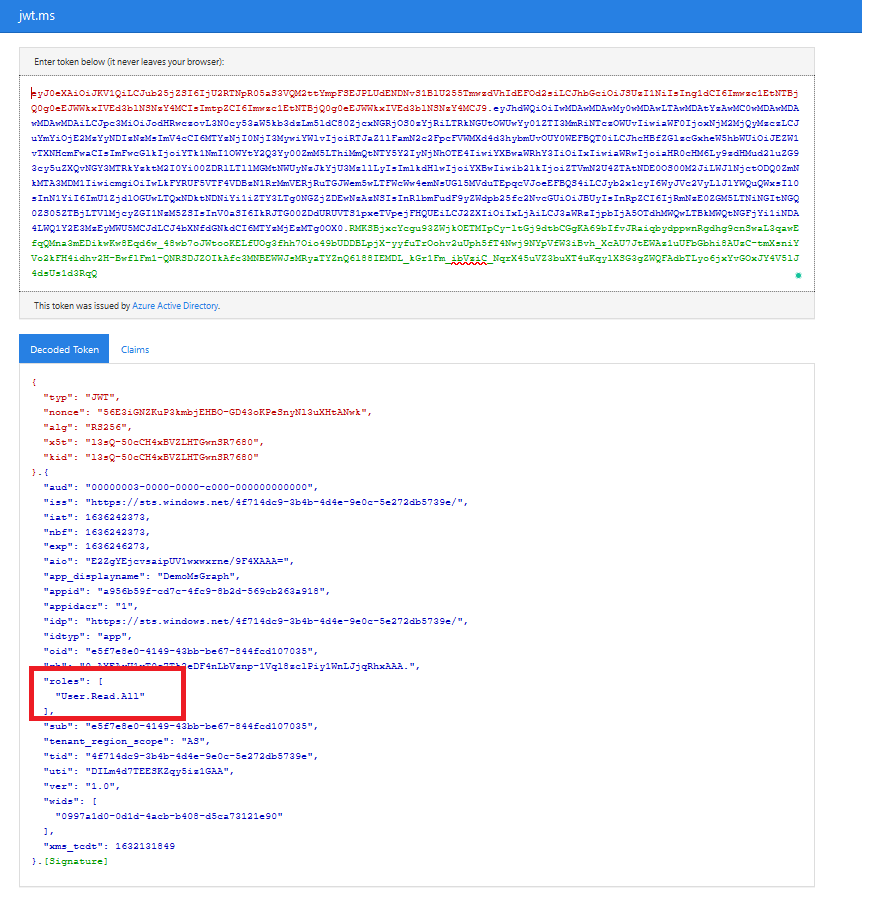 Validate the access token using jwt.ms page
Create The Flow
The last step is to create the Flow. Because we will use the x-www-form-urlencode and I didn't know how to set it up in the Flow,I found this blogpost that helps me to overcome this issue.
Open the make.powerapps.com > go to Flowsblade > click New Flow button > set the flow name > choose Manually trigger a flow> click Createbutton.
Insert a new step and fill it like below:
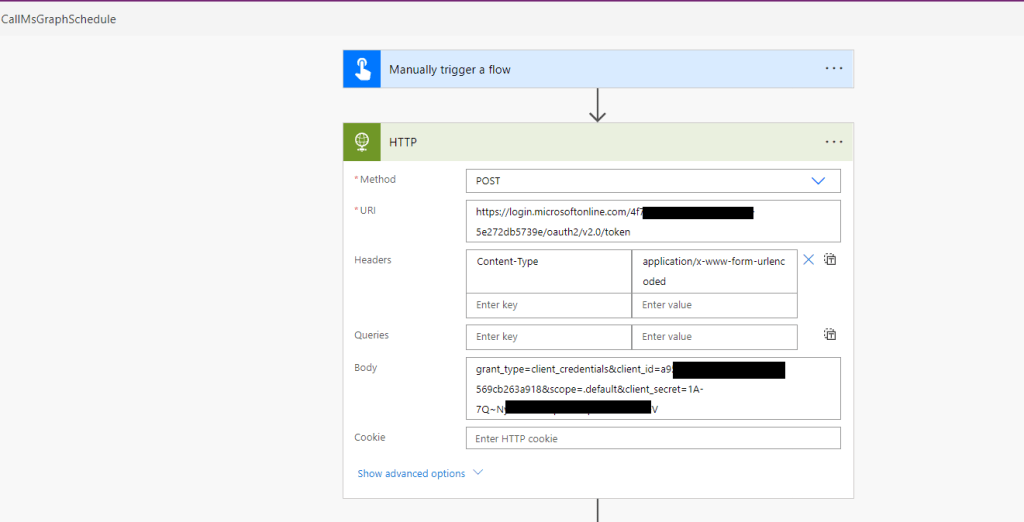 Get The Access Token
You can click save and try to test it. Once your Flow is successfully invoked, you can get the response and create a new step to parse the JSON (copy the body response and click Generate from sample button (on Parse JSON action, and paste there).
In the last step, we will use the access token that we get, to the HTTP action. Here is my action to call the List user API:
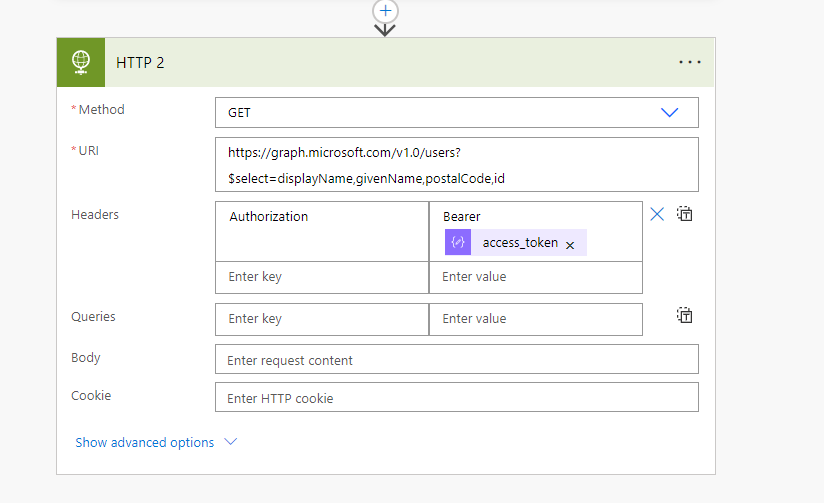 Call List user API
The result:
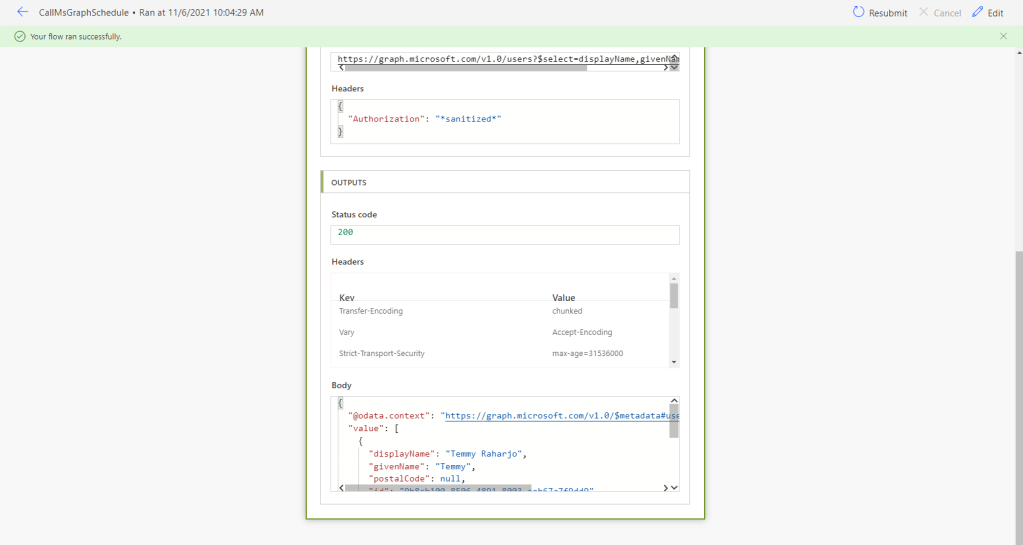 Result of the demo
Happy trying!
Leave a comment
Your comment is sent privately to the author and isn't published on the site.