Azure Data Factory: Read CSV file, Transform and push data to Dataverse
Let's try to create a simple scenario that we can do in Azure Data Factory! Azure Data Factoryis a serverless data integration service that sits in the Azure. The terminology of ETL (Extract, Transform, and Load) or ELT (Extract, Load, and Transform) can be processed by it, and there are lots of connectors (like Power Automate) to read from multiple sources and push the data into the destination.
For today's scenario, we will do a simple scenario that utilizes Azure, self-hosted to take the Customers CSV file from Azure Blob Storage > transform the row into the needed format > push the data into Dataverse. FYI, as this is an exploration blog post, it might be the best "performance" yet, and I am open to suggestions.
Azure Data Factory Resources
If you go to adf.azure.com (create Azure Data Factory from portal.azure.com if you haven't) > Author > Factory Resources. You will see 5 types:
- Pipeline: a group of activity(s) that define data integration and transformation tasks.
- Change Data Capture (preview): for Delta load purposes (only push the data that changed from the last run). We will not cover this in this blog post.
- Dataset: Sources/Destinations data. We need to configure a "Linked service" (how to connect to the data source) for each of the data.
- Data flow: define a flow to get data (can be in multiple data sets), transform, sort, aggregate, filter, etc, and define the output to be used in the pipeline.
- Power Query: similar to data flow but using the Power Query instead of the actions step.
Customer CSV Data
For the Customer CSV Data, I downloaded it from Datablist and made some minor changes to show the capabilities of the ADF (Azure Data Factory). The change was to join the FirstName + LastName and also modify the date format:

Sample customer data
Once the CSV file is ready, you can upload the CSV file to the Azure Blob Storage (you need to create it if you haven't).
Create Linked Services
As mentioned, we will retrieve data from Azure Blob Storage and push it into Dataverse. Hence, we need to create these 2 Linked Services.
You can go Manage > Connections > Linked Services:
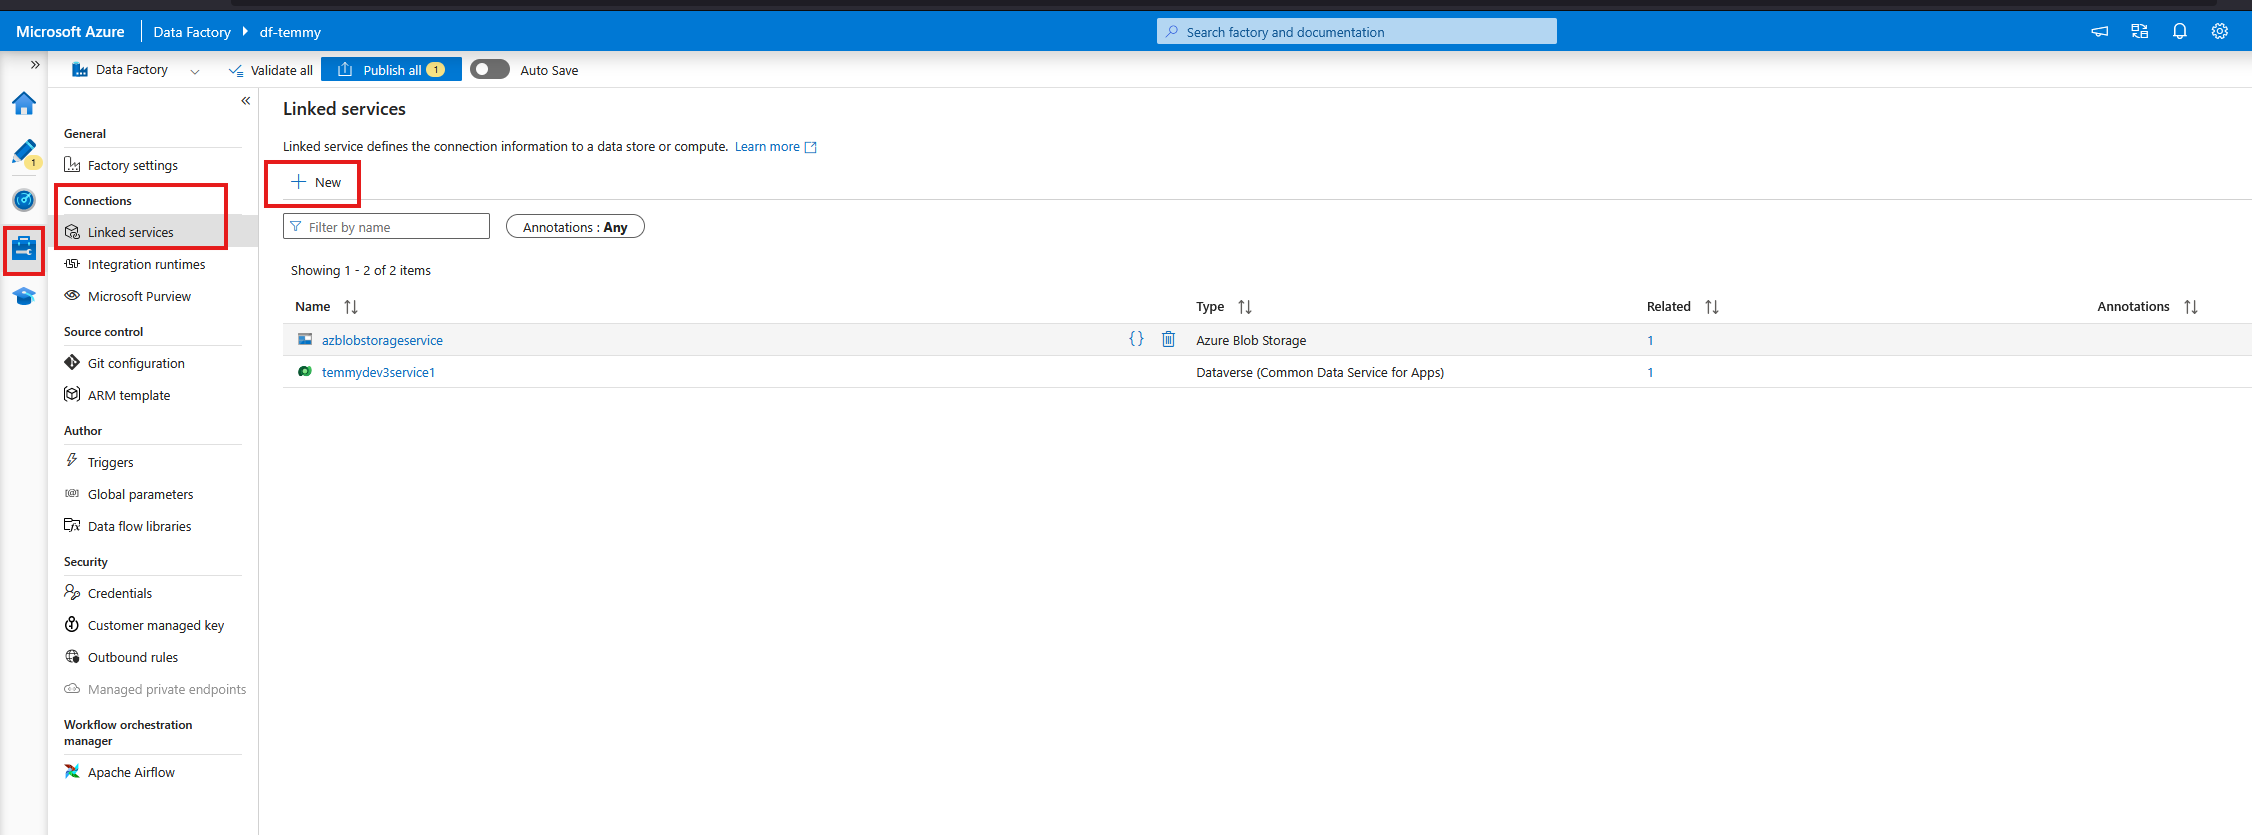
- Create New button > search for Azure Blob Storage. You can select how to authenticate with it. For my demo purposes, I select the Account Key > select the From Azure subscription > set the Storage account name
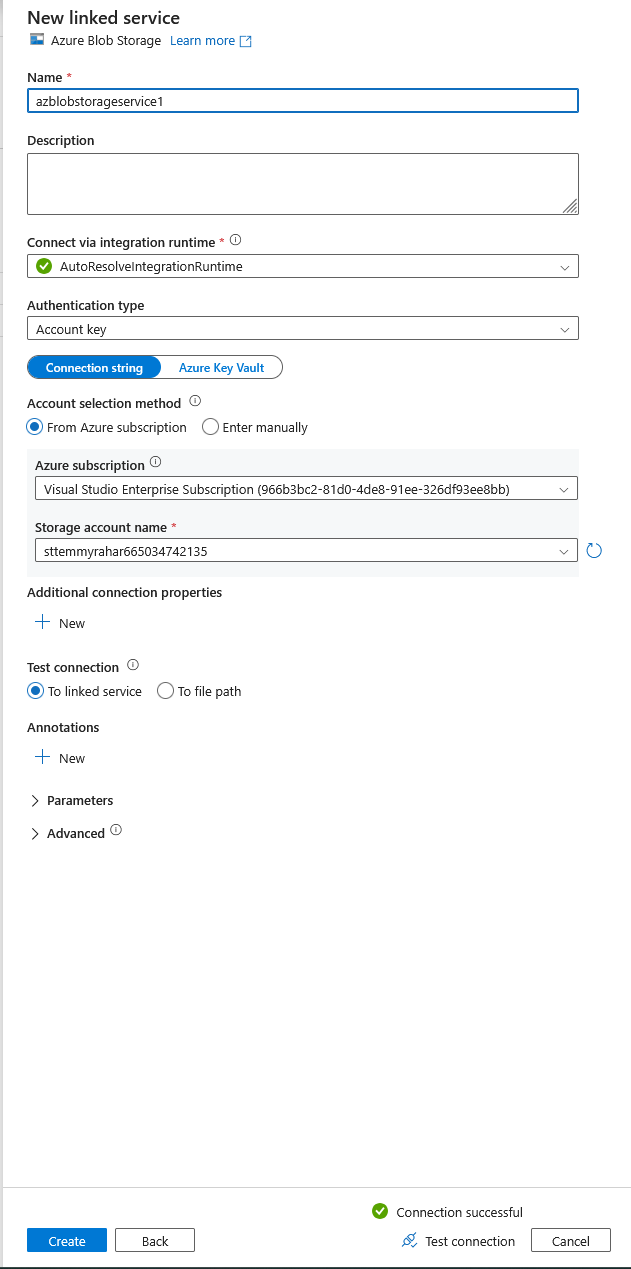
- To connect to Dataverse, I'm using a Service Principal account. Hence, I need to fill in the URL, Service Principal ID, and the Key.
Once this is ready, we can start creating the Pipeline!
Pipeline
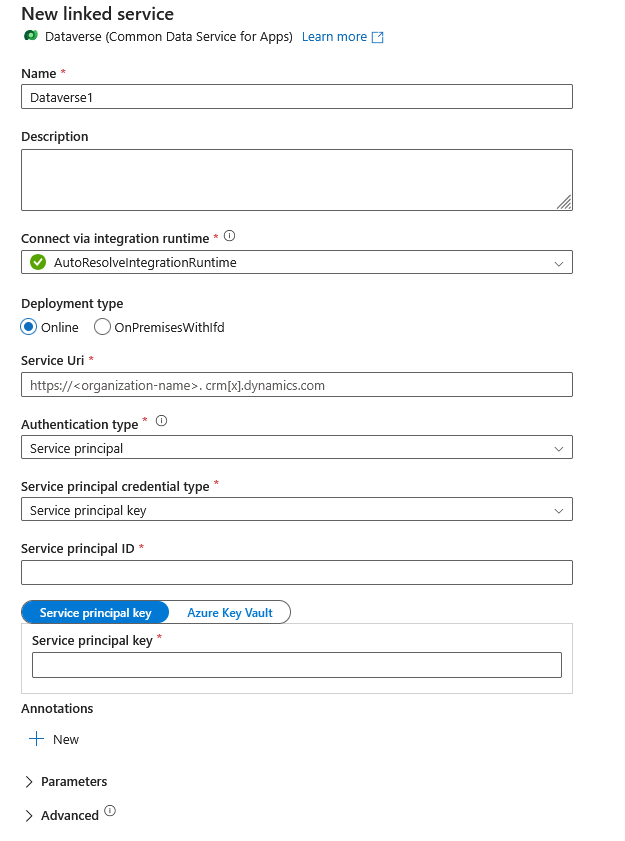
Create new Pipeline > Set the name as "LoadCsvFileToDataverse". For this demo, we only need to create one Data Flow:
LoadCsvFileToDataverse Pipeline
Because I also want to test the speed, in the Data flow > Settings > you can select "Compute size" to whatever load that you want (in this setting, I set as Large).
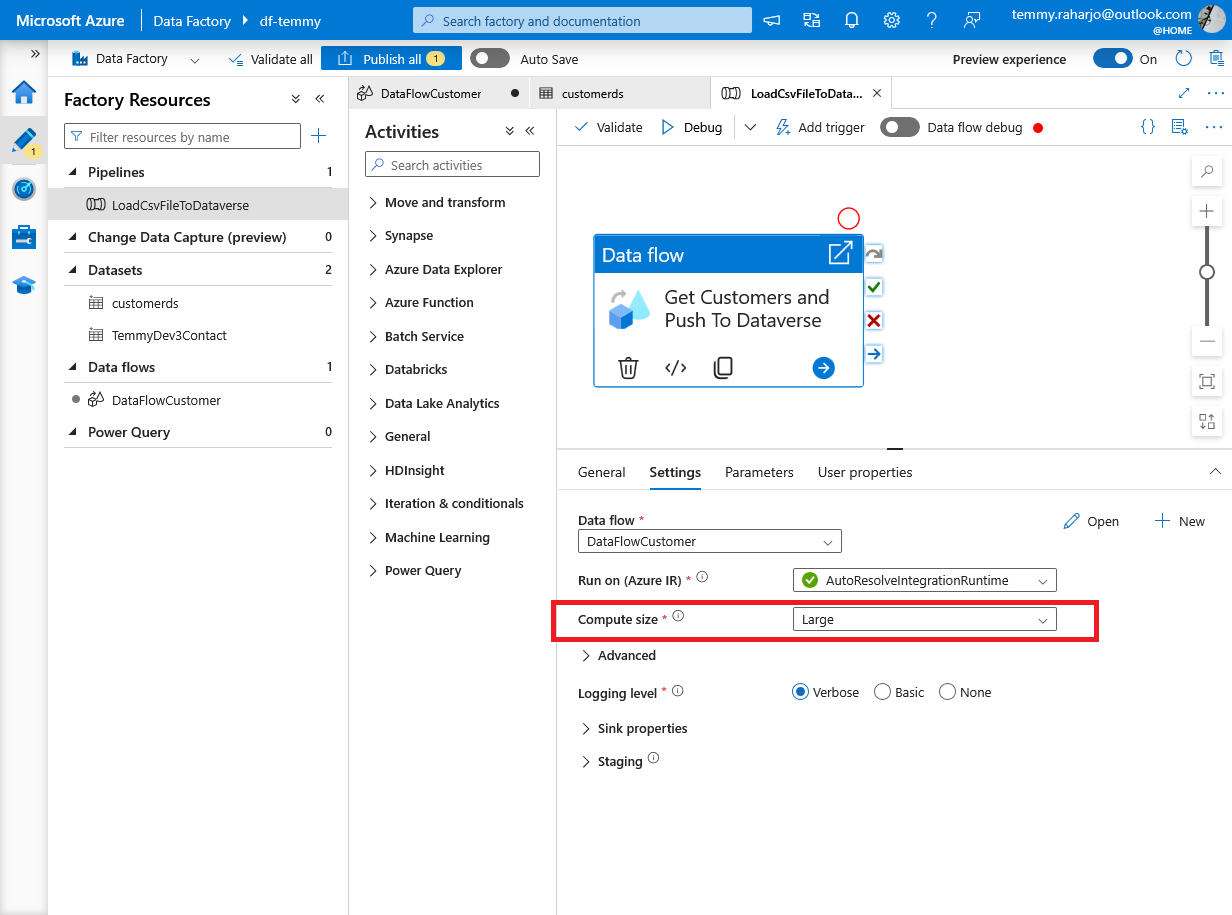
Compute size "Large"
Data flow
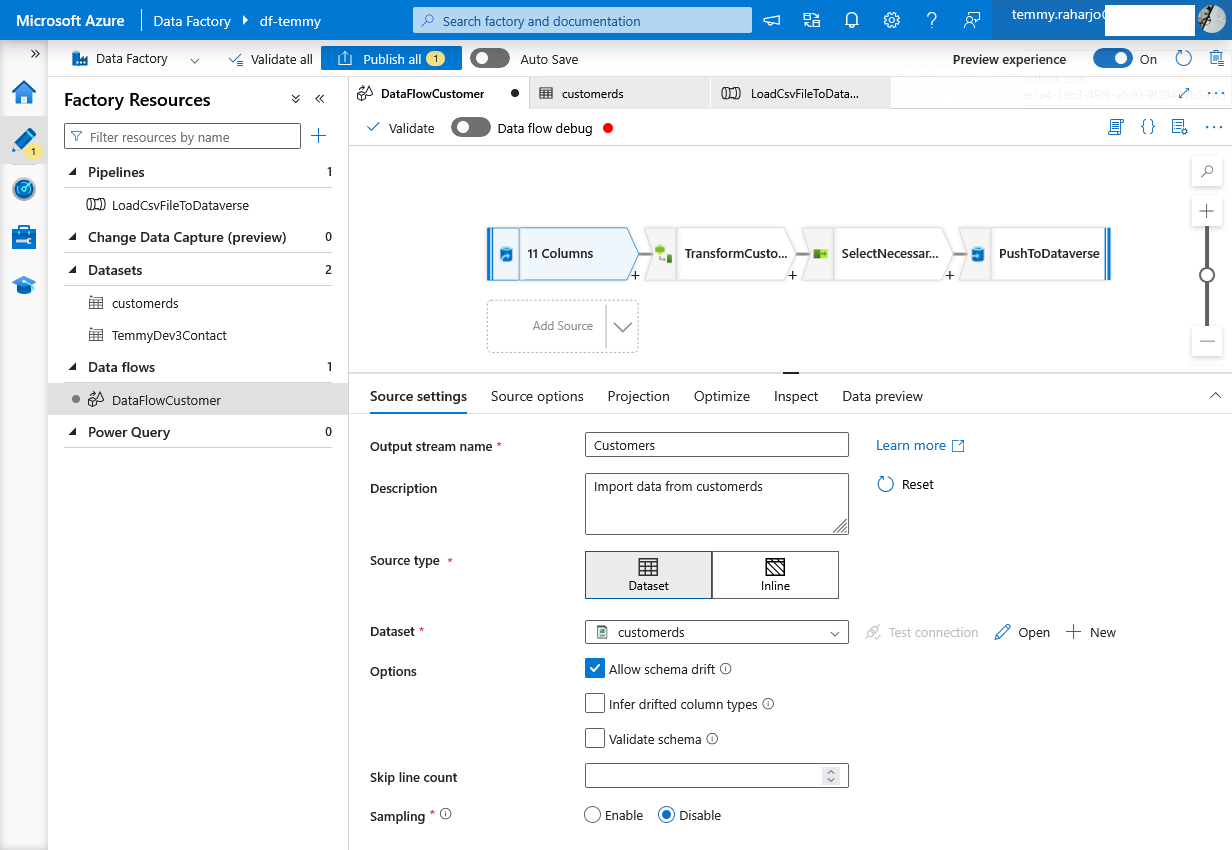
Get Customer from Azure Blob Storage CSV file
Next, I created a "Derived Column", and I created additional columns like the below:
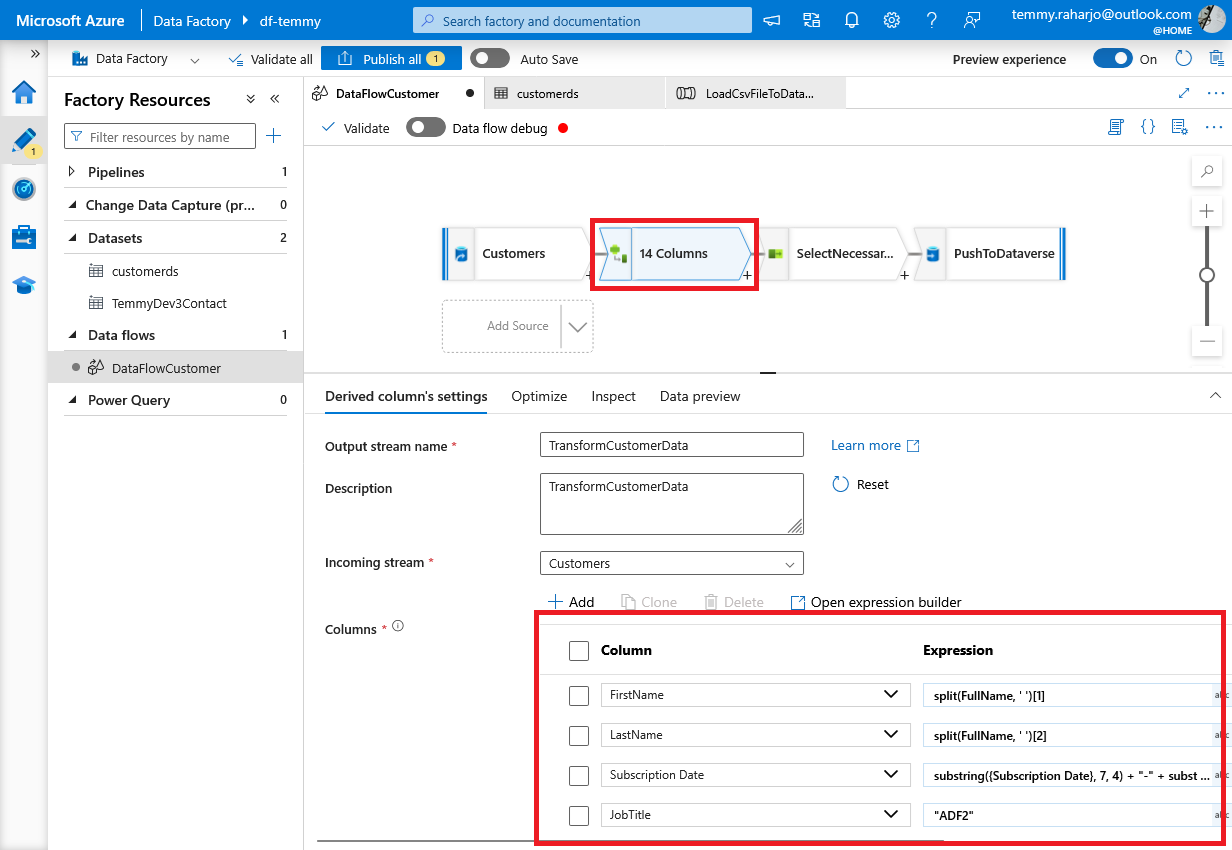
Derived Column
As you can see in the above, I created the FirstName and LastName columns (using splitfunction based on the FullName). Then, on Subscription Date, I'm using command "substring(, 7, 4) + "-" + substring(, 4, 2) + "-" + substring(, 1, 2)" to basically change the string date format from "dd/MM/yyyy" into "yyyy-MM-dd" format.
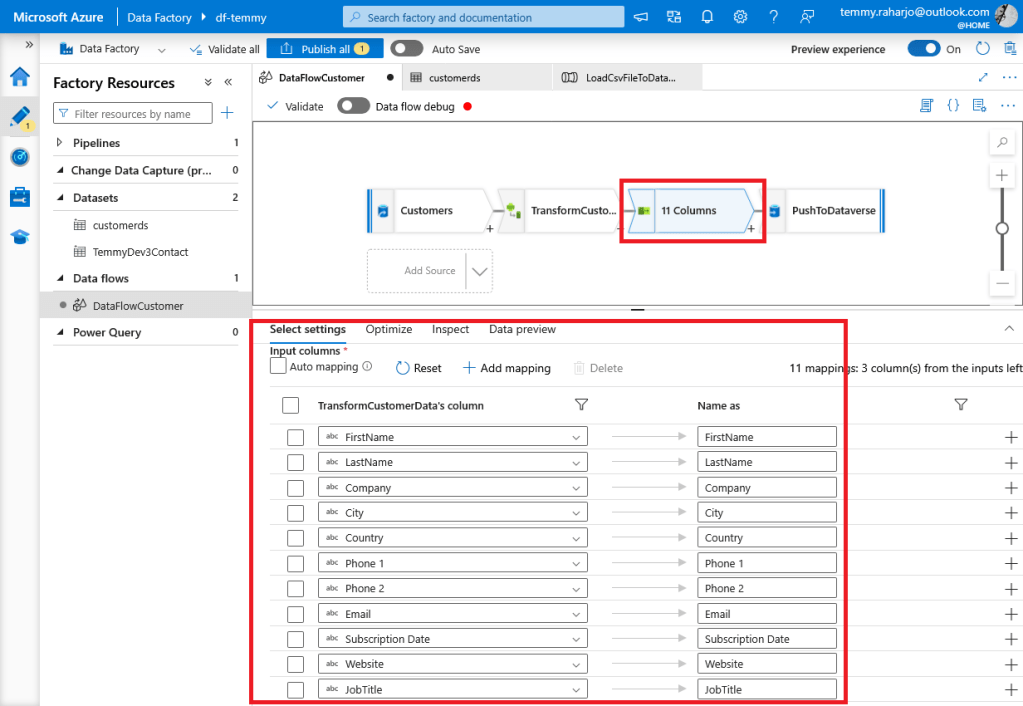
Next, we set the "Select" action and only select the attributes that we need.
Last, we select the "Sink" action and set the Data set to the Contact table (Dataverse):
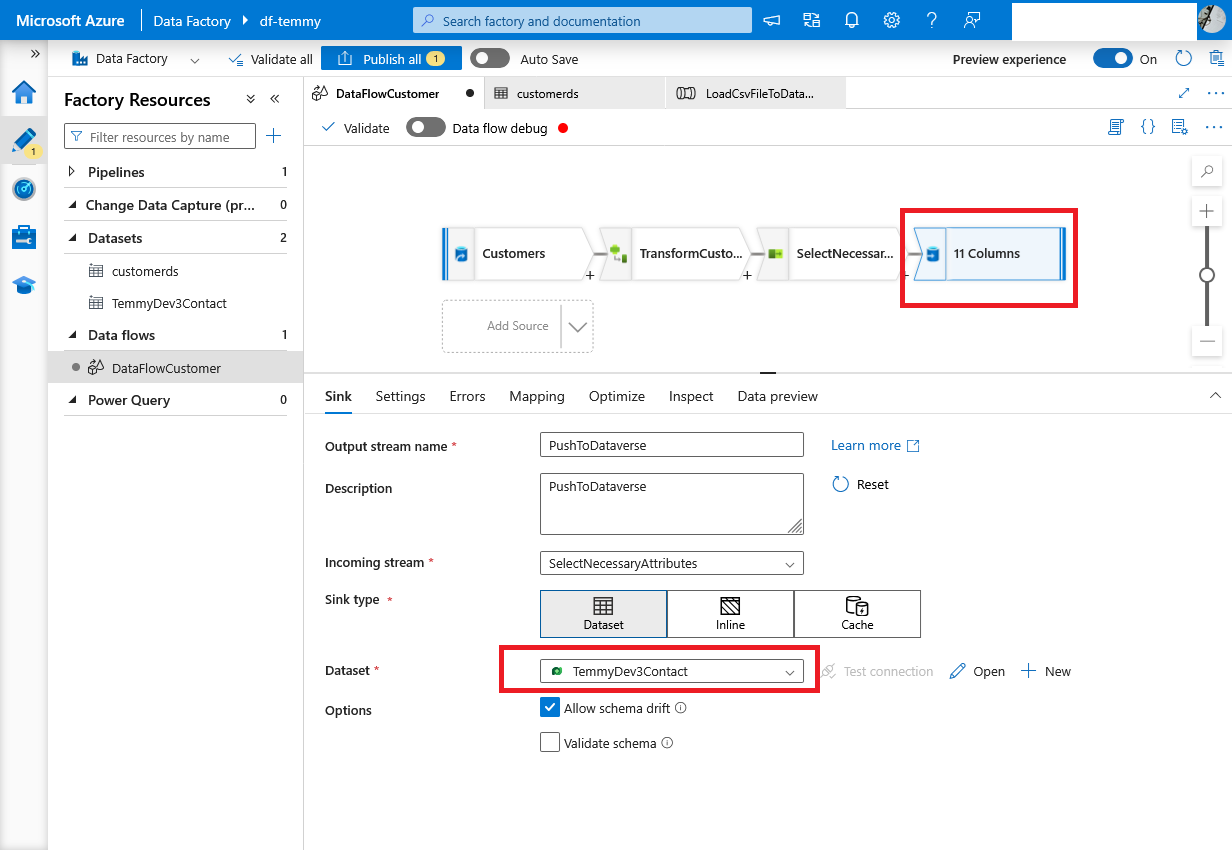
Sink action #1
On the mapping site, we need to create a mapping and must input the logical attribute name manually:
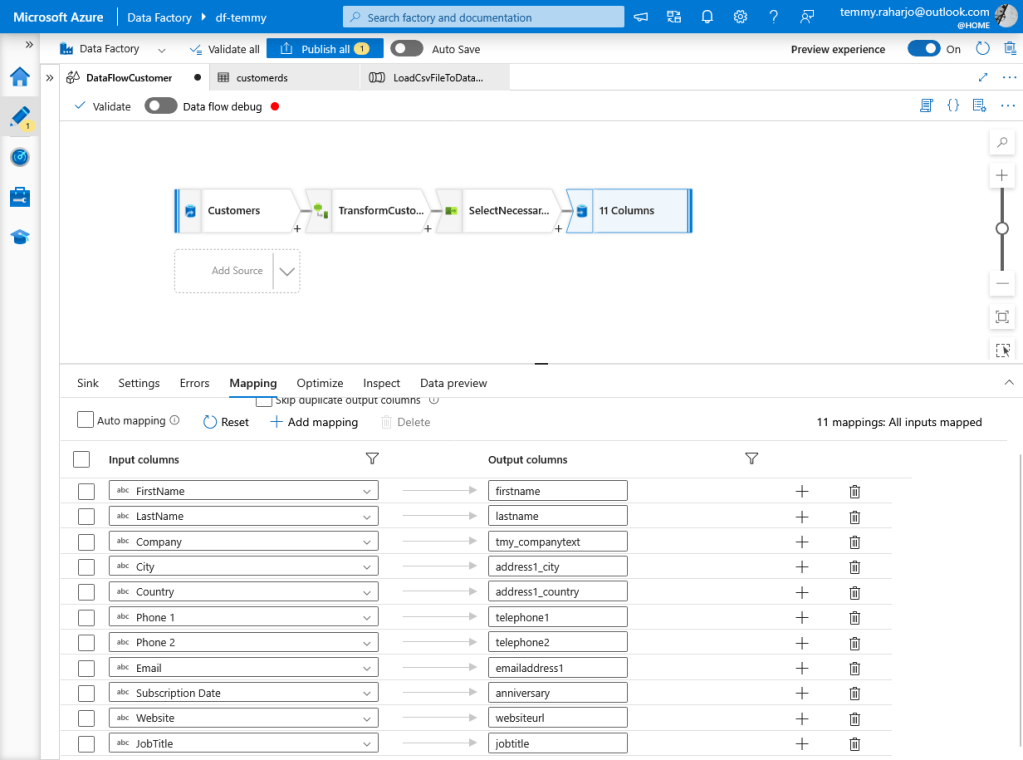
Mapping attributes
Once this is done, we can click "Publish all".
Run the Pipeline
If you go to the pipeline again, you can set the trigger point of the Pipeline. There are several configurations, such as Schedule, Storage events, Custom events, or Tumbling window:
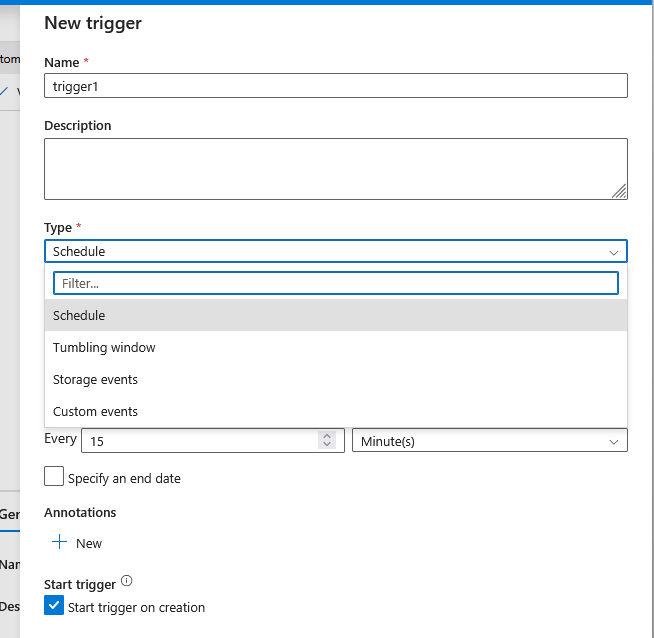
Trigger to run the pipeline
But for this demo, I just directly run the pipeline by clicking Add Trigger > click Trigger now:
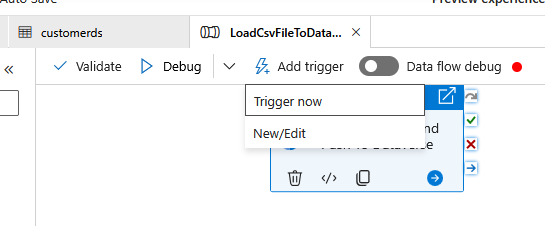
Trigger now
Once you have done this, you can monitor the process by going to "Monitor" > Runs > Pipeline runs:

Monitor Pipeline runs
We can also go to each step. But, based on this testing, I saw the monitoring part is not reflected correctly.
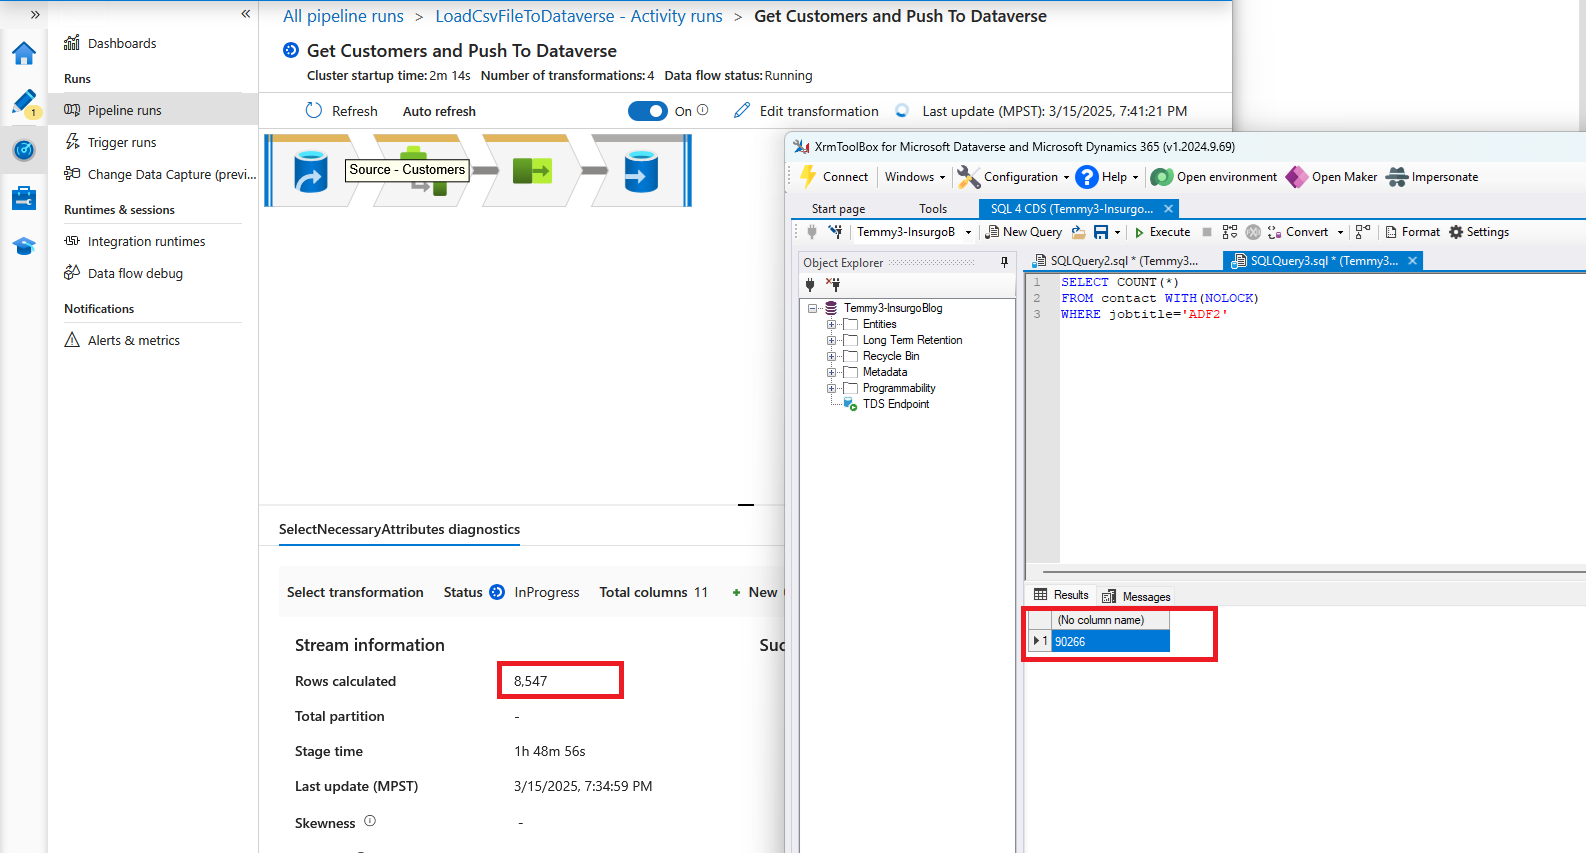
Discrepency monitoring vs the inserted data in Dataverse
Summary
Running an insert of 500k Contacts takes almost 7 hours (but this duration also takes long because the Dataverse instance is a dev instance).
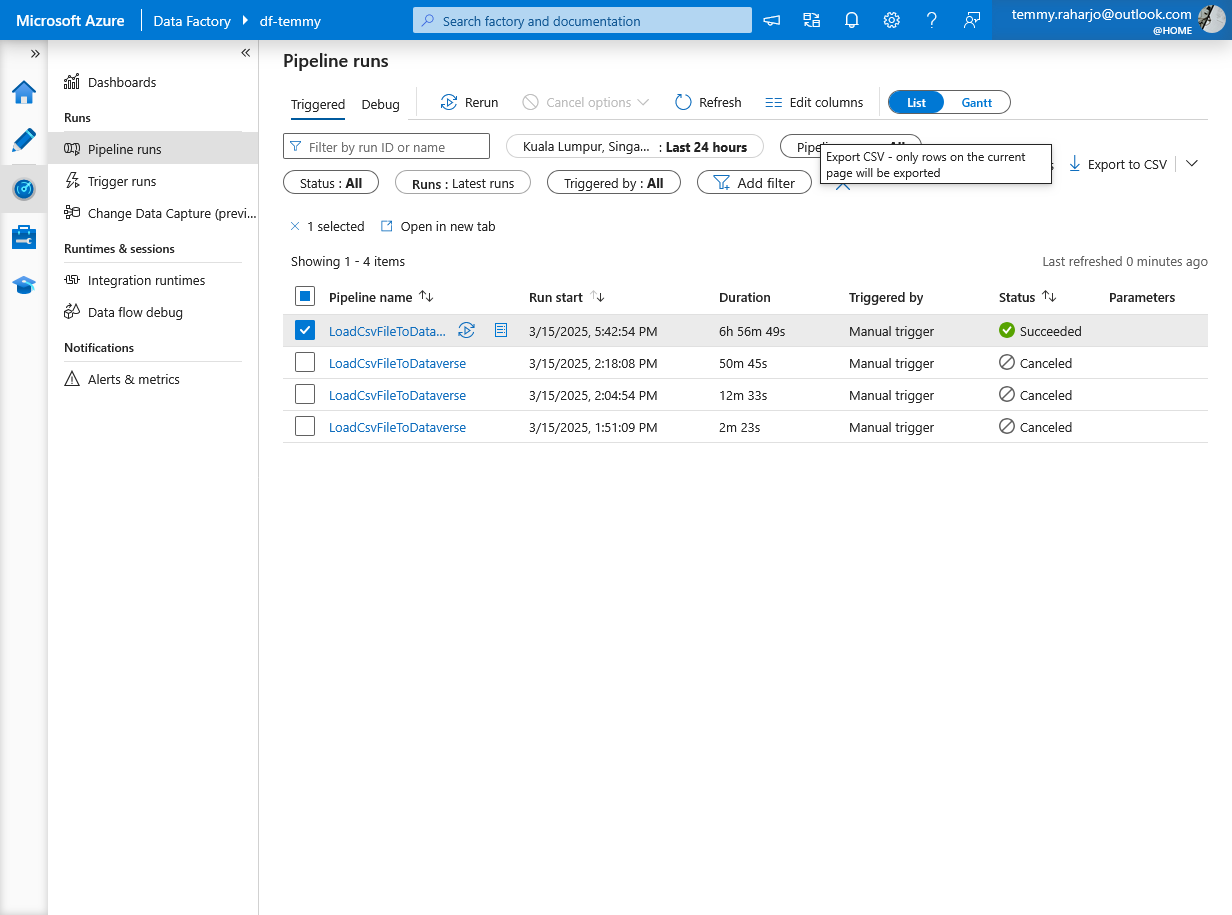
Pipeline runs history
Compared with SSIS with Kingswaysoft-Dynamics365, the Dataverse connector in Azure Data Studio lacks options. One thing for sure is there is no option to bypass plugin execution, which means we need to turn off the plugin step by ourselves, which makes the running time longer.
In terms of learning curves, its kinda easy. I can search and configure what I want easily. But I still need time to inspect each of the steps to know what's happening behind (is the operation using Bulk operation/Single operation, Power Query vs manual step to transform the record - which one is faster).
Happy CRM-ing! 🚀
Leave a comment
Your comment is sent privately to the author and isn't published on the site.